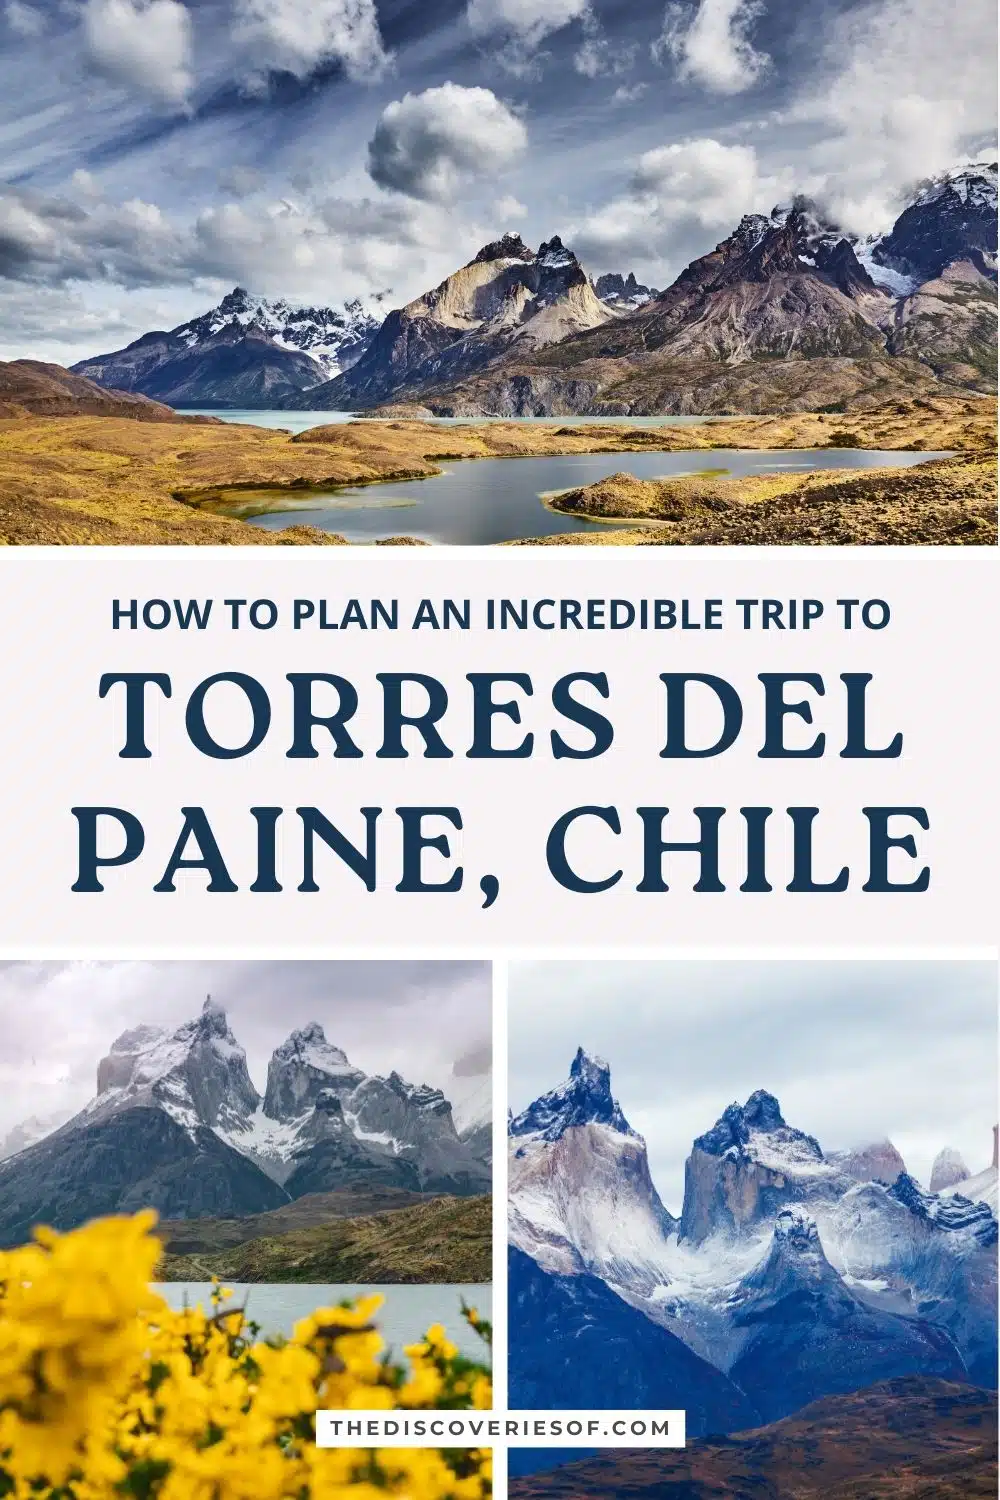
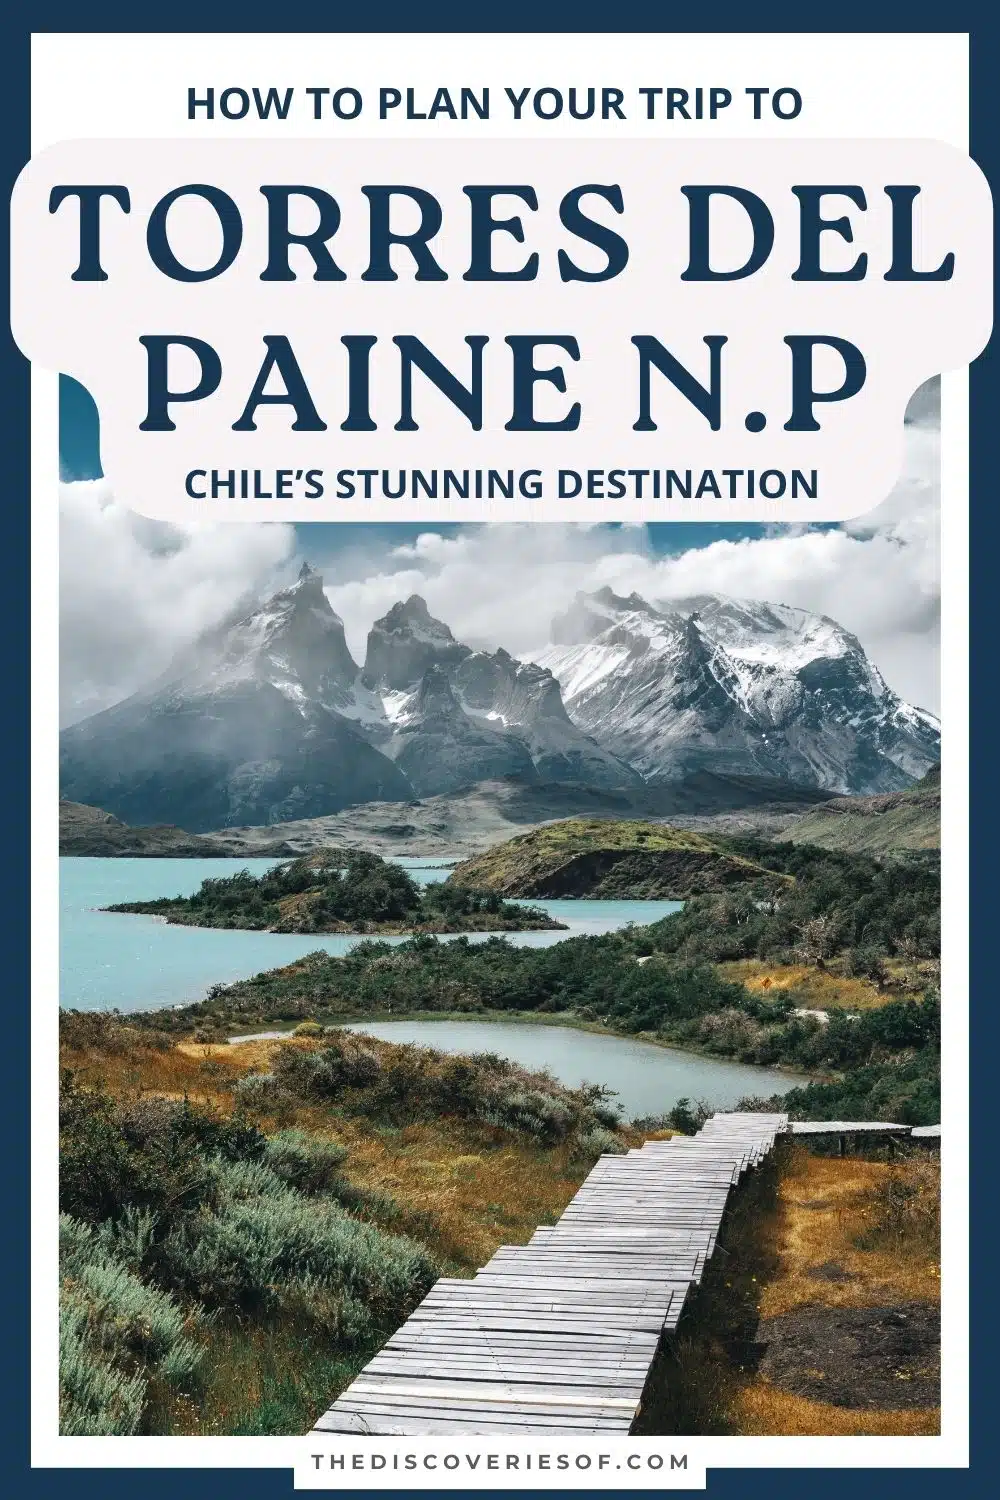
The Torres Del Paine National Park is located in the south of Chile, in Chilean Patagonia to be precise. Planning your Torres del Paine W Trek? Read this detailed guide, complete with all the information that you need to know to help you plan the perfect trip.
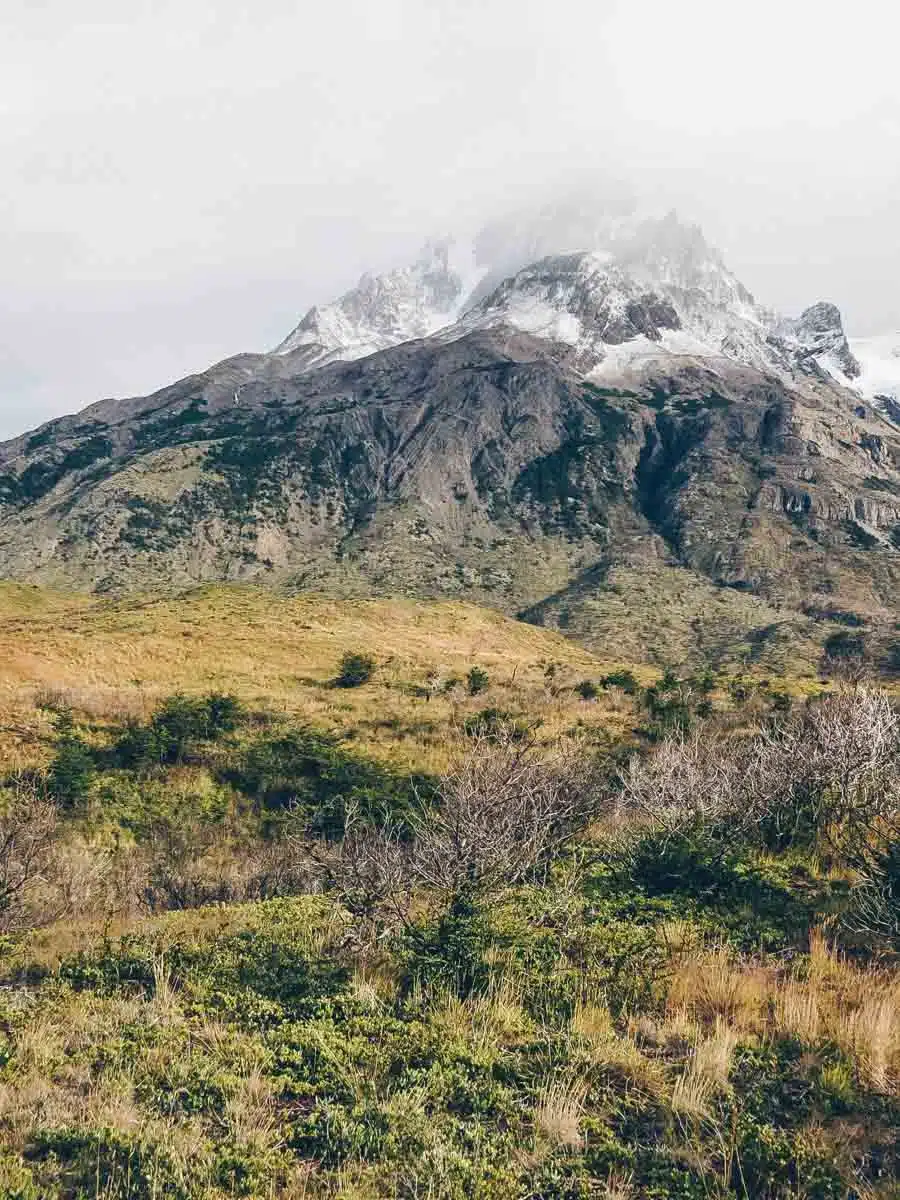
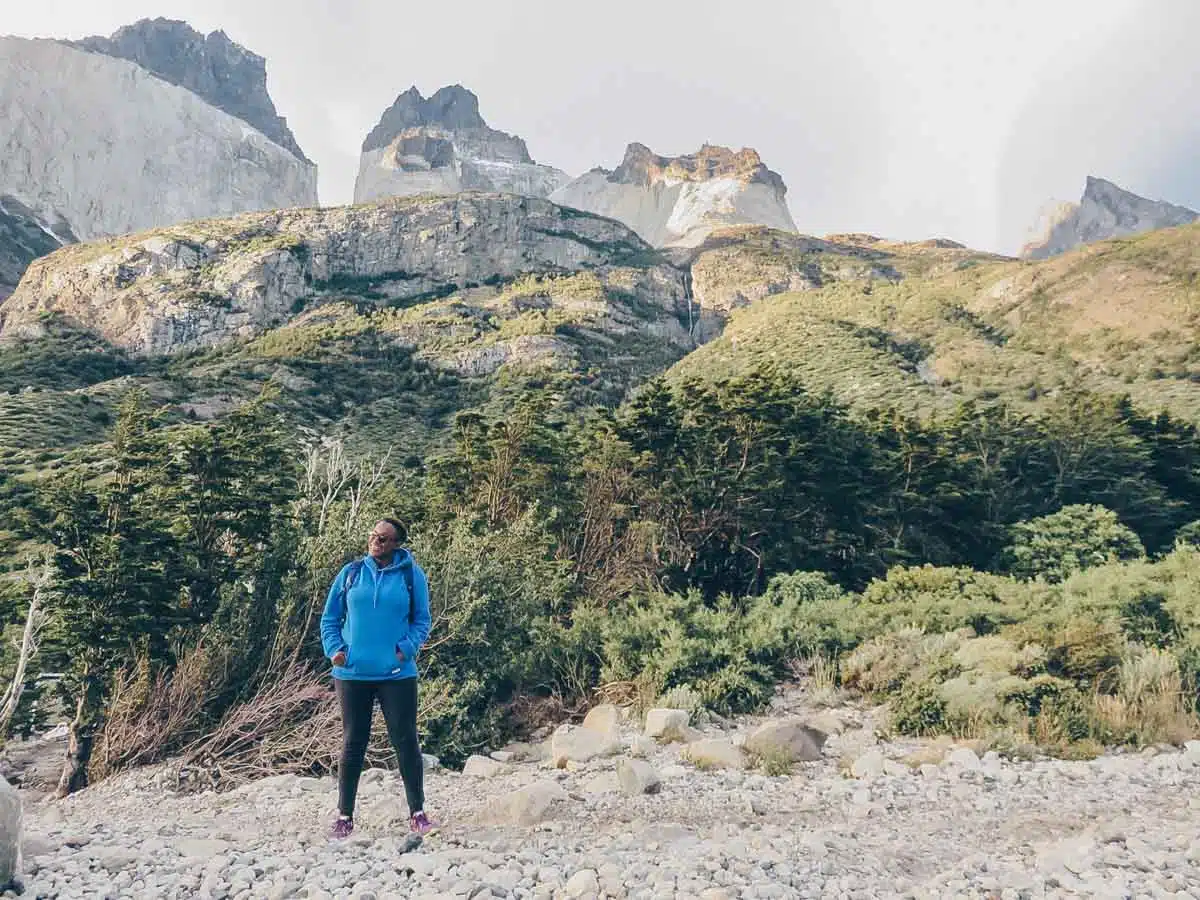
The Torres del Paine in Chile is a land of wild landscapes, where high, craggy mountains dominate the skyline.
They are complemented by sparkling lakes, vast glaciers and some of the most extreme weather conditions on the planet.
There’s a good reason why the Torres del Paine W Trek is one of the most famous hikes in the world. Torres del Paine is basically what happens when you cram all of the beautiful things on earth into 181,414 stunning hectares.
I don’t remember the first time I heard of the national park. It seems to me that for as long as I’ve been traveling, it’s been there on my South America bucket list.
Doing the trek was one of the most memorable experiences I’ve ever had and totally everything that I could have hoped for.
If you’re considering taking on the W Trek, I’d say to go for it. But it helps to understand what to expect so you can ensure that you are fully prepared before you go.
Which Torres del Paine Trek Should I Choose?

The two main trekking routes in the Torres del Paine National Park are the ten-day O Trek or the five-day W Trek.
The W Trek is named after the shape you follow throughout the course of the trek.
The O Trek – also called the Torres del Paine circuit trek, follows the same route as the W Trek but then has an additional five days of hiking through the back side of the national park.
The W trail sections of the park tend to be busier, as far fewer people opt for the O Trek.
As I hadn’t hiked for ten days for about as many years, I decided to focus on the five-day “W” trek.
If you only have time to do one of the Torres del Paine day hikes you are best off booking a tour to allow you to maximise the time that you can spend in the park.
Torres del Paine W Trek Patagonia Itinerary: At a Glance
- Day 1 – Transfer from Puerto Natales: Hike Lago Pehoe to Refugio Grey
- Day 2 – Hike Refugio Grey to Paine Grande
- Day 3 – Hike Paine Grande to Los Cuernos
- Day 4 – Hike Los Cuernos to El Chileno (and the Torres del Paine)
- Day 5 – The Torres, then Hike El Chileno to Hotel Las Torres: Transfer to Puerto Natales
Torres del Paine W Trek: What to Know Before You Go
While I do think that most people who are in reasonable shape can complete the W Trek, it isn’t just a walk in the park. You’ll need to come prepared for several days of hiking 8-15 miles, often uphill or on gravel surfaces, and you’ll need to have proper gear with you.
But I really do think that the W Trek is accessible to people who are willing to prepare properly for it. If I could do it as a solo, first-time multi-day hiker, you can definitely do it too!
To help you get an idea of what to expect, here are a couple of FAQs about the Torres del Paine W Trek that I get often from readers:
What’s the Torres del Paine W Trek Distance?
The W Trek is about 100 kilometers or 62 miles long.
What’s the Torres del Paine W Trek Difficulty?
Overall I would rate the W trek a 2.5/5. It is not that difficult.
I am a notorious klutz when it comes to descents and at best reasonably fit and I had no problems with the trek.
Most of the W Circuit in the Torres del Paine is quite easy, but there are some steeper sections where you might need to take it a bit slower on the ascent and descent.
The section between El Chileno to the Torres del Paine is quite difficult, mainly because it’s a long pull upwards, but it’s not that hard.
While I do think that most people who are in reasonable shape can complete the W Trek, it isn’t just a walk in the park. You’ll need to come prepared for several days of hiking 8-15 miles, often uphill or on gravel surfaces, and you’ll need to have proper gear with you.
The section where you ascend to Mirador Frances and Britanico on the third day is also going to set your legs on fire – luckily it’s also one of the days with the best views, so you win some and you lose some.
Do I Need a Tour to Hike the Torres del Paine or Can I Do the W Trek Self Guided?
Do you need to do a Torres del Paine W Trek tour? Absolutely not. You can join Torres del Paine hiking tours to hike the W and/or O trail but it is by no means necessary.
The benefits of taking a Torres del Paine guided trek to tackle the trail are:
- You don’t have to carry your camping gear with you
- You don’t have to carry your food with you
- You will be grouped with other people, which can be particularly nice if you’re going solo
- You won’t need to spend time planning your hike route or booking camps and/or refugios during the hike.
- They generally include transport from Puerto Natales, so you don’t need to worry about arranging this yourself.
Of course, all of this comes at a price.
A Torres del Paine W Trek tour with my favourite tour operator G Adventures costs £949 / $1300. Check W Trek Availability.
Essentially it’s much cheaper to do a self guided w trek and I’ll assume for the rest of this W trek blog that this is what you are doing.
If you do decide to do a tour, it’s worth reading on anyway so you know what to expect.
When Can I Trek the W?
Typically, the main season for trekking the W is late October through March. During this time, all of the campsites, refugios, and ranger stations will be open, and you can hike on your own without a guide.
In the high season, the weather is super variable and can range from sunshine and light breeze to thunderstorms, sleet, and high winds. I have experienced all of the above in my 2 trips to Torres del Paine, and a lot of it has to do with luck.
This could be completely anecdotal, but we talked to a local who used to work in Torres del Paine and she said that the mildest weather occurs in November and in late February to early March. Use that information however you’d like.
For cold weather-loving hikers, the W Trek’s trails are actually open all year. However, you can only hike in the winter with a guide, so it will be considerably more expensive.
Which Direction Should I Hike the Torres del Paine W Trek?
Hiking the W Trek in Torres del Paine can be done in two ways.
The first is from west to east, starting with a catamaran trip to Refugio (Hotel) Paine Grande.
It follows then that the other is from east to west. If you hike in this direction, you start by going straight to the Torres on the first day and working westwards after that.
Both directions have their benefits but I’d been told that the west to east route had better views of the Los Cuernos mountains and started with a relatively simple day’s hike to ease you in.
Think we can all agree the Los Cuernos (pictured above) do look spectacular from that direction.
If you hike from west to east, you also get two chances to see the Torres del Paine: both on the evening on the penultimate day, and on the morning of the final day.
Considering that the weather in the park is very changeable, and the Torres are often shrouded in mist, I think it’s much better to do the hike in from west to east.
If I’m doing a Self Guided W Trek Patagonia, Should I Camp or Stay in Refugios?
Ultimately the answer to whether you camp or stay in refugios (mountain refuges) comes down to three things: money, weight and effort.
Money because the refugios are a lot more expensive to stay in than the paid-for campsites in the national park, and infinitely more expensive than the free campsites in the national park.
Weight because if you aren’t camping in the refugios, you will need to carry your tent and a sleeping mat with you in addition to all the other things you are carrying in your backpack.
Effort because obviously carrying more stuff takes more effort.
If you’re camping, you are going to be in charge of carrying and cooking all your food too. If you stay in the refugios, you can book to have meals there and have them prepare you a packed lunch for your trek each day.
I’ve gone into a lot more detail towards the end of the guide about campsites and refugios in Torres del Paine for the W hike.
How To Prepare for Hiking the Torres del Paine W Circuit
The level of preparation you will need to do for the trek will depend on a number of factors: mainly whether you are doing a tour or not and whether you are camping or staying in the refugios along the way.
If you are going to take a tour, you don’t really need to do anything other than making sure you’ve got everything you need. I’ve written a Torres del Paine packing list to ensure that you don’t miss anything when you are preparing.
If you are not taking the tour, these are the things I would definitely recommend doing to prepare for the hike:
- Decide which direction you are going to hike the trek
- Ensure you have packed or hired all of the items on this Torres del Paine packing list before you leave Puerto Natales.
- Buy all the food you need for the trip while you are in Puerto Natales
- Go to the talk at Erratic Rock in Puerto Natales
You might also find this guide to preparing for a trip to Patagonia useful to give you more tips for your trip.
Choose Your Route
Before you can book your campsites, you’ll need to choose your W trek route. You can take one of two directions on the W Trek, and itineraries range from 3 days to 5+ days.
Depending on how much time you have and how much walking you want to do each day, you can plan your route that way.
Book Your Torres del Paine Campsites and/or Refugios
If you’re doing the W Trek, you’ll need a place to stay each night of your trek. Luckily, there are various options based on your budget and comfort preferences. In general, there are two ways to stay in Torres del Paine: camping or refugios.
Camping involves either bringing your own gear or renting it at the campsites, sleeping in a tent, cooking in the kitchen areas, etc. It’s pretty similar to any other camping experience, except you’ll have hot showers, a convenience store, and running water in most campsites.
You can read my entire, detailed guide on camping in Torres del Paine here.
Refugios are the more bougie accommodation options on the W (although I wouldn’t call them “luxury,” per se…). These usually consist of large cabins that have dorm rooms accommodating 4-6 people.
Usually, the basic package only includes a bed, and you’ll have to provide your own linens/sleeping bag. For an extra fee, you can purchase a full meal service in the refugio restaurant and have your bed made with sheets during your stay.
Only certain campsites have refugios — see below for details.
There are 7 campsites and refugios on the W Trek that you can choose from:
- Grey (Campsite & refugio)
- Paine Grande (Campsite & refugio)
- Italiano (Campsite only)
- Frances (Campsite & eco-domes)
- Cuernos (Campsite & refugio)
- Chileno (Campsite & refugio)
- Torre Central (Campsite & 2 refugios)
Honestly, booking campsites in Torres del Paine is a bit of a frustrating process and requires some patience.
The campsite reservation websites break often, some of them are not translated into English, and with three different operators to choose from, it can get extremely confusing.
However, just remember that booking your accommodations is one tiny obstacle in the way of a totally epic and amazing trip!
Book Your Flights, Buses, and Puerto Natales Accommodation
You’ll need to make your way to the Patagonian city of Puerto Natales before heading onward to Torres del Paine for your trek. Puerto Natales is known as the “base city” for Torres del Paine, and is the place where you’ll run your last errands before embarking on your W trek.
Booking your flights and buses well in advance can same you a lot of money and hassle. Before you leave for Chile, I recommend booking (at a minimum) the following:
- Round trip flights from Santiago (SCL) to Punta Arenas (PUQ)
- One-way bus from Punta Arenas Airport to Puerto Natales
- Accommodation in Puerto Natales
Here are some more details on how you’ll get to Puerto Natales, your base city for Torres del Paine:
To start, you’ll fly to Punta Arenas on either SKY Airlines, LATAM, or JetSmart.
For the lowest fares, I recommend booking your flight at least 1 month in advance. You can compare flight prices on Skyscanner or a similar flight aggregation service.
There are several direct flights per day, but I strongly recommend flying in the morning so you can travel directly to Puerto Natales (3 hours by bus) when you land.
Next, you’ll catch a bus from the airport to Puerto Natales. While buses leave from both the Punta Arenas bus station as well, you’ll save yourself a taxi ride by booking a direct bus from the airport.
Buses leave almost every hour and are operated by Buses Fernandez and Bus Sur. In my trips, I have used and recommend both bus companies.
You can book your bus to Puerto Natales in advance here (which I strongly recommend during the high season). When you arrive at Punta Arenas airport, go directly outside to the passenger pickup area, then take a left towards the first entrance. This is where the buses pick up passengers.
Once you’re in Puerto Natales, you’ll probably want to stay there a day or two so that you can prepare for your hike. From there, you can take a 7:00 AM bus any day of the week to Torres del Paine National Park.
Getting to the start of the W Trek requires either one more shuttle ride or one more catamaran ride after you’ve arrived at the park. I’ll explain this a bit more in detail later in the post.
How Can I Prepare Fitness-Wise for the Trek?
I’m no fitness expert, so I can’t comment with any certainty or authority here. However, I will say that many of the people I met on the trail had never done a multi-day hike before, and there were people of all ages, body types, and fitness levels on the trails.
Personally, the W Trek was my first fully-packed multi-day trek, and that it was challenging but not impossible. The hardest part of the whole thing was the mental stamina required to hike 7+ miles a day for 5 days straight.
From my own experience, here are a few things I’d recommend doing before trekking in Torres del Paine:
- Complete at least 2-3 full day hikes of over 8 miles.
- Be able to walk up to 15 miles in one day (this is especially important if you are doing a shorter version of the W trek)
- Work out 3-4x per week (cardio and strength)
- Recognize that mental stamina is equally as important as physical stamina on these long treks
Go to the Erratic Rock Talk (Or Watch it Online Here)
So most of the stuff above is pretty explanatory, but you might be scratching your head a bit at the last one. What’s the Erratic Rock talk? Read on.
Erratic Rock is a hostel in Puerto Natales, the town nearest to the park. The hostel’s trekking guides give a free talk about what it’s like to hike the Torres del Paine and to help you prepare for the trek each day.
You can watch a version of the talk here.
Even if you do, I’d still recommend getting yourself there as this video isn’t from this year and some of the info like bus times etc might have changed.
To be honest, the talk was exactly the wake up call that I needed before setting off on my solo Torres del Paine W trek circuit.
I’d been feeling fairly lighthearted and cheerful. Then I heard phrases such as “80km per hour winds” and “torrential rains” and started to feel that little bit less sure.
The main takeaway from the Erratic Rock talk was that the weather in the Torres del Paine park is notoriously unpredictable. So much so that no one ever checks the weather forecast.
What’s the point in having a forecast when the weather can change from heavy rains to blazing sun, shift over to fierce winds and then again to snow in the course of one day?
So no weather forecast.
Which basically means preparing (and carrying kit for) every feasible weather eventuality.
I can’t say I was thrilled by the prospect, and chances are, you aren’t going to be either. Everything that is on your back at the beginning of the trip needs to be carried every step of the way. Including your rubbish.
If you’re hoping to travel light, you can… but it’s risky. At the very least you should make sure that you have enough kit to stay safe and warm if the weather turns bad.
Extra Note: Don’t Stress if You are Hiking Solo
I’m not one of life’s worriers – preferring to adopt a somewhat blase “it will be alright on the night” attitude to most things. But the Erratic Rock talk did make me think twice about whether I was completely nuts doing this hike on my own.
It wasn’t anything they said at all. It was just that as I looked around the hostel, it struck me that everyone else seemed to be in pairs or groups. They were all busily discussing who would carry what, who’d be in charge of what.
There was no one else alone and frantically taking notes with the knowledge that if something was forgotten, there would be no one else to remember it, no one to remind them.
Thankful as I was for the talk, it’s fair to say that I came out of it several times more pensive about trekking in the Torres del Paine than when I’d gone in.
All I am going to say at this point is don’t worry. If you’re travelling solo, you will be fine.
What to Pack for the W Trek
Needless to say, packing for the W trek in Torres del Paine is not a process you want to skimp on. It can be a bit of a challenge because you generally want to minimise weight without forgetting anything important.
To help you out with a starting point, here are the bare essentials you’ll need for your trek:
I’ve actually written a super in-depth guide to packing for the Torres del Paine W Trek – so read that, but here are the key takeaways.
Personal Gear to Bring
A comfortable backpack: You’re going to be walking up to 13 miles (21 kilometers) per day, so you’re going to need the most comfortable backpack possible that takes the weight off your shoulders. If you’re planning on bringing your camping equipment with you, I’d recommend getting a 60-70 liter backpack.
Two sets of clothing: For both the W Trek and the O Trek, I recommend bringing two sets of clothes – one for trekking and one for sleeping. Depending on your tolerance for cold, I’d recommend bringing several merino wool or synthetic layers that you can pull on and off depending on the weather conditions.
Women: Fleece jacket – Long sleeve – Short sleeve – Tank top – Leggings
Men: Fleece jacket – Long sleeve – Short sleeve – Leggings
Thermal and waterproof shells: Because the weather is so unpredictable, you should have some comfortable outerwear to trek in and sleep in. For multi-day treks, I swear by my Patagonia packable down puffer and my Marmot rain jacket.
Sturdy, waterproof hiking boots: Even if the weather is nice during your entire trip, you should wear waterproof hiking boots while you trek. Why? Because you’ll need to cross muddy trails and cold streams nearly every single day. Don’t forget a few pairs of thick wool trekking socks too!
Toiletries & a quick dry towel: One of the nice things about the campsites in Torres del Paine is that most of them have lukewarm hot water, which means you can take a nice, refreshing shower at least once every two days. Don’t forget your toiletries (I prefer the solid variety since, ya know, we’re in a national park and plastic isn’t cool) and a quick dry towel.
Critical Camping & Hiking Gear
A lightweight tent: I recommend the Big Agnes Copper Spur HV UL2 for all backpacking and camping excursions – it’s one of the lightest and most durable tents out there!
Sleeping bag and thermal sleeping mat: If you’re wondering what kind of sleeping bag to bring with you, follow two criteria: it should be a) lightweight and b) warm. I have a Kelty Cosmic Down that I bring basically everywhere with me and it was great for backpacking in Torres del Paine!
Lots of backpacker meals or lightweight food: We sampled a variety of backpacker foods and definitively decided that our favorite brand was Backpacker’s Pantry. They have tons of different flavors you can bring along with you (our favorite was the Three Sisters Stew), and all you need to do is add boiling water!
Cooking supplies: You’ll need a packable cooking pot, stove, gas cannister, and silverware (yep, don’t forget silverware!!) to cook your meals.
Eco-friendly soap and a quick-dry scrubber: Be sure to get eco-friendly soap (I love CampSuds) and a stink-free scrubber so you can clean your dishes after every meal.
Lots of recyclable plastic bags: Bring as many recyclable plastic bags as you can. They don’t give them away at stores in Puerto Natales, so I’d recommend bringing them from home. Not only can you use them to pack up your dry stuff and protect it from rain, but you can also use them to carry out your trash from the park. (DO NOT LEAVE THESE IN THE PARK!)
Preparing for the W Trek: 1-2 Days Before
How to Get to Puerto Natales
Getting to Torres del Paine from Santiago is a long but simple journey: you fly to Punta Arenas, take a bus to the base city of Puerto Natales, and from there, you’ll take a final bus to get to Torres del Paine. Does this sound a bit stressful? Don’t worry, I’ll break it all down for you below:
- Fly from Santiago (SCL) to Punta Arenas (PUQ).
- Walk outside and take a left toward the first airport entrance.
- Take the direct bus you booked on Buses Fernandez or Bus Sur from Punta Arenas airport to Puerto Natales.
- When you arrive in Puerto Natales, walk (~10-15 minutes) or take a taxi (1,500-2,000 CLP) to your hotel or hostel.
Everything You Need to Do in Puerto Natales Before Your Trek
Once you’ve arrived in Puerto Natales, these are the things you absolutely need to do before heading to Torres del Paine:
Book your bus tickets to and from the park: Before you leave the bus station upon arrival in Puerto Natales, you’ll need to purchase bus tickets to and from the park. I recommend buying a flexible round trip ticket with Bus Sur that you can use any time on the day of your departure.
Purchase your CONAF park entrance online (optional): There’s a kiosk at the bus station where you can purchase your CONAF ticket so you won’t have to do it at the park entrance. While this won’t really save you any time there, it’s good to do this in advance for the peace of mind!
Get cash: There are no ATMs in Torres del Paine, so I strongly recommend getting some cash for incidentals/emergencies in the park.
Buy food & gear: Look over your packing list, and if there are additional things you need before trekking in Torres del Paine, be sure to get them in Puerto Natales. Personally, I recommend getting some dried fruit at Itahue Frutos Secos and hitting up the grocery store for some snacks.
Wrap your clothes and sleeping gear in waterproof material: If there’s one thing you need to know and remember during your time in Torres del Paine, it’s that the weather can change in an instant. Like, one minute it’s sunny and blue skies, and the next minute the wind picks up and fat wads of cold rain are pelting your face. Because the weather is so unpredictable, be sure to wrap your clothing bags, sleeping bag, and sleeping mat in plastic or waterproof coverings to keep everything dry, even if your backpack gets soaked.
Screenshot or print all campsite reservations: Be sure to screenshot and/or print all of your campsite reservations, as the check in staff will require proof of your reservation every night!
Send important documents & itinerary to a trusted person at home: It’s always a good idea when traveling to give someone at home access to your documents (e.g., passport, PDI paper, travel insurance) as well as your itinerary, just in case you’re in trouble and need help from home. Also, make sure that your loved one also has a “code red” date; basically, they will agree to contact authorities if they haven’t heard from you by that date.
Check email & update your social media: Not necessary but, as there’s limited WiFi in the park, it’s probably a good idea.
Arriving in Torres del Paine: What to Expect
Arriving in Torres del Paine National Park is…well…kind of a sh*t show. You’ll get in with no problems, but not without waiting in tons of lines, filing lots of paperwork, and struggling to make sure you’re on the right bus to the right place at the right time.
Don’t fret! I’ve laid the entire process out for you step-by-step in this section.
How to Get to Torres del Paine from Puerto Natales
Most buses to Torres del Paine from Puerto Natales leave sometime between 7:00 and 7:30 AM. You’ll need to head to the bus station a day or two before to reserve your bus ticket.
There are probably half a dozen bus companies that service Torres del Paine. Erratic Rock will recommend Bus Gomez, but we disliked them for a number of reasons during our most recent trip.
Personally, I’d recommend going with Bus Sur, which always gave us really good service, ran on time, and was comfortable and clean. All buses leave from the Rodoviario Puerto Natales.
You’ll want to grab a ticket for the 7:00 AM bus so you can get in line for the entrance sooner.
However, getting a 7:00 AM ticket doesn’t actually guarantee that you’ll get on the 7:00 AM bus (We know, we had 7:00 AM tickets and got booted to the 7:30, meaning I ended up being the last of the park entrants that morning…that sucked. Don’t try it.).
To actually ensure you’re on the 7:00 AM bus, I recommend getting to the station no later than 6:40 AM.
Entering the Park: What to Do and Where to Go
Entering the park should be really straight forward because everyone has to do it, but unfortunately, entering Torres del Paine is a chaotic, disorganized mess. Hang in there, I promise that the park is worth the initial frustration!
First of all, remember what your bus and driver look like if you’re going to Pudeto. If you’re headed to Laguna Amarga, get your stuff off the bus and carry it with you in the line.
Once you (and all 10 other 7:00 AM buses) arrive at the entrance to Torres del Paine, a park ranger will enter the bus and give you instructions for how to proceed.
Generally, this means getting in a long AF line, watching a short video about fire safety in the park, and then proceeding to buy your ticket.
Yes, you still have to wait in the long AF line if you bought your ticket online. (Insert sad face emoji here.)
You’ll see the line as soon as you arrive — it stems out onto a balcony in front of a small building and usually wraps around a couple of times (depending on how early you get there). First, you’ll wait in the line, then, you’ll head into the room with the safety video. The video is only ~5 minutes long.
Next, you’ll leave the video room and head into a second room with some cashiers, as well as some rangers that are giving away park maps. If you haven’t bought your ticket yet, this room is the place to do so, and as of when I wrote this, you could only pay in cash.
Once you pass into the second room, people who bought tickets online can skip past them to the final checkout place, where a ranger will hand you a park map and send you on your way.
The park map is your BFF. DON’T LOSE IT. It has all of the trails, distances, and elevation stats spelled out nice and clearly for you. (Sometimes the map is a liar, but we’ll get into that a bit later…)
Pro tip: They don’t let you bring backpacks into the cashier room, so set yours down on the porch outside before entering or you’ll have to leave the line and get in the back. Yes, this happened to us.
If you’re heading to Laguna Amarga (Torres Central or Seron), you’ll bring all your stuff from the entrance and catch a local shuttle (3,000 CLP, cash only) to the trails.
For those, like me, heading to Pudeto for the catamaran (Paine Grande or Grey), head back to your bus (I hope you haven’t forgotten which one was yours…?) and continue on to the pier.
Hiking the Torres del Paine W Circuit: A Day by Day Trek Report
W Trek Patagonia Day 1: The Trek To Refugio Grey
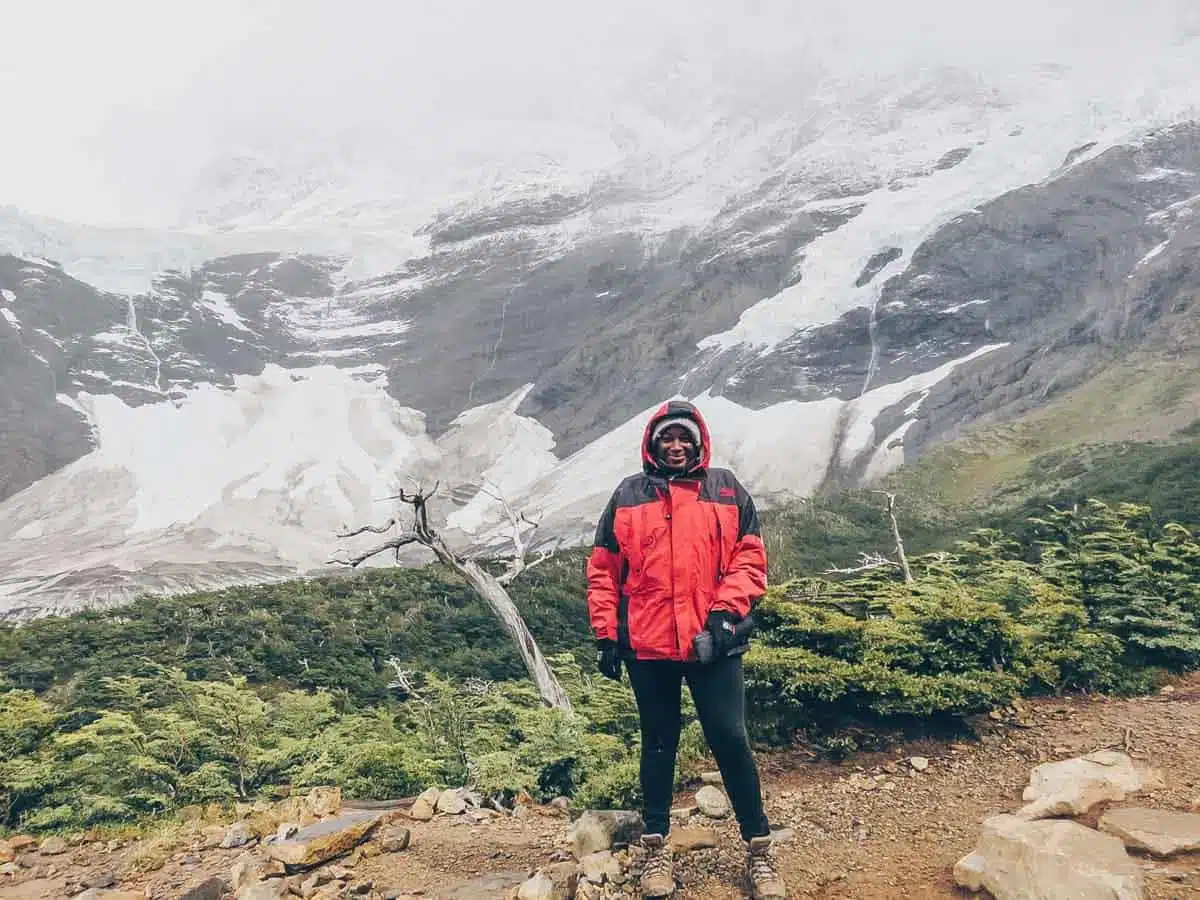
The moment I stepped off the catamaran to start the first day trekking in the Torres del Paine, it started raining.
Knowing that the rain might not stop for a few hours at least, I set off. Hiking poles in hand, pack in tow. It was windy and rainy to the point my glasses were doing that comedy thing of being so wet I couldn’t see through them. Hooray.
After a few short, steep climbs, the rain had stopped and the sun came out.
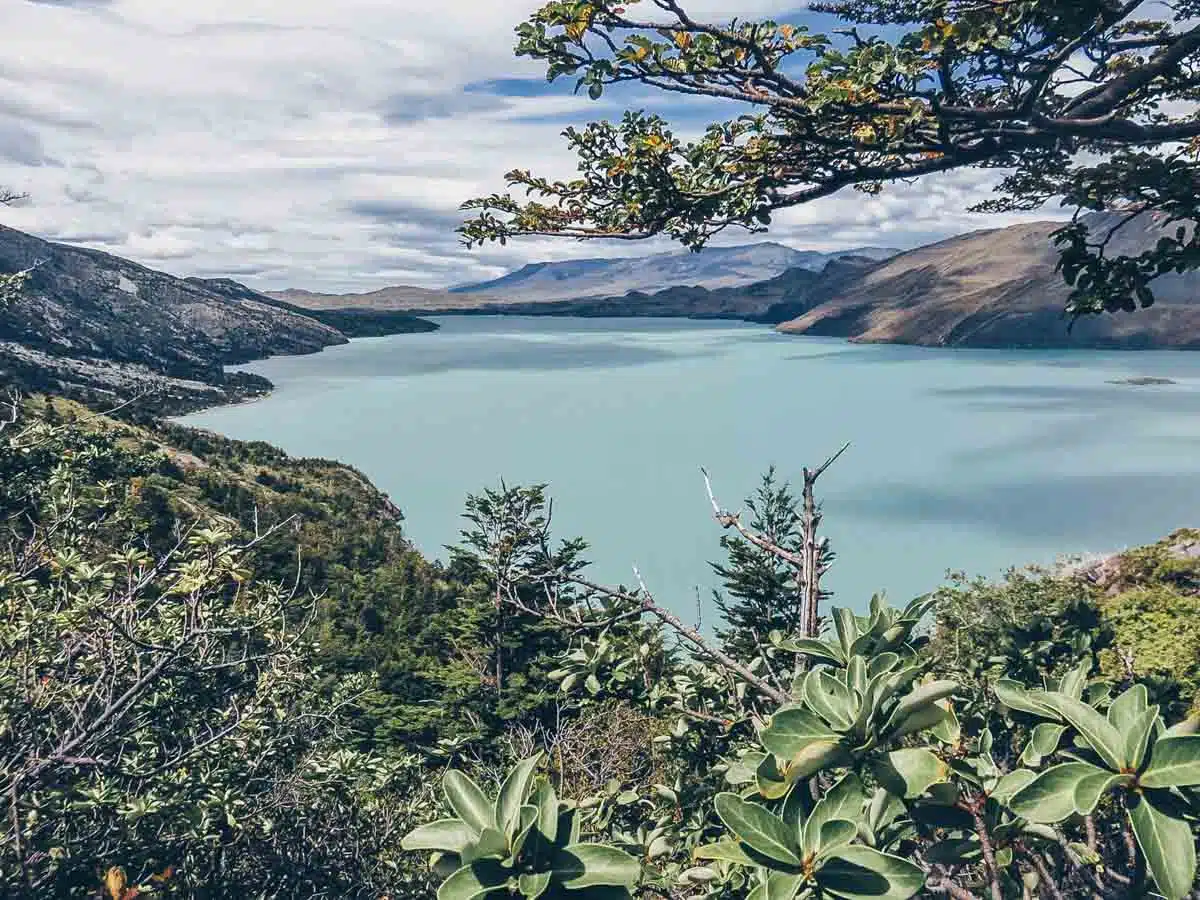
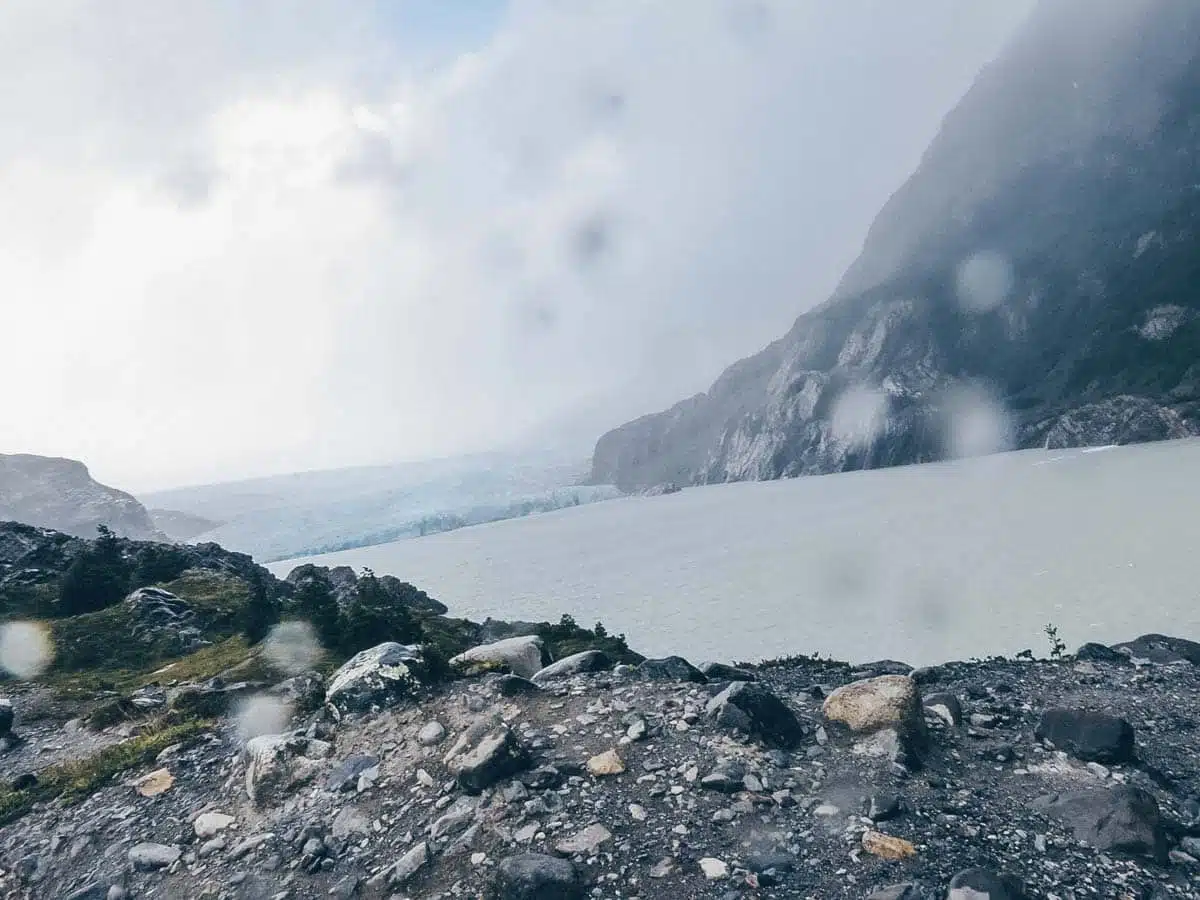
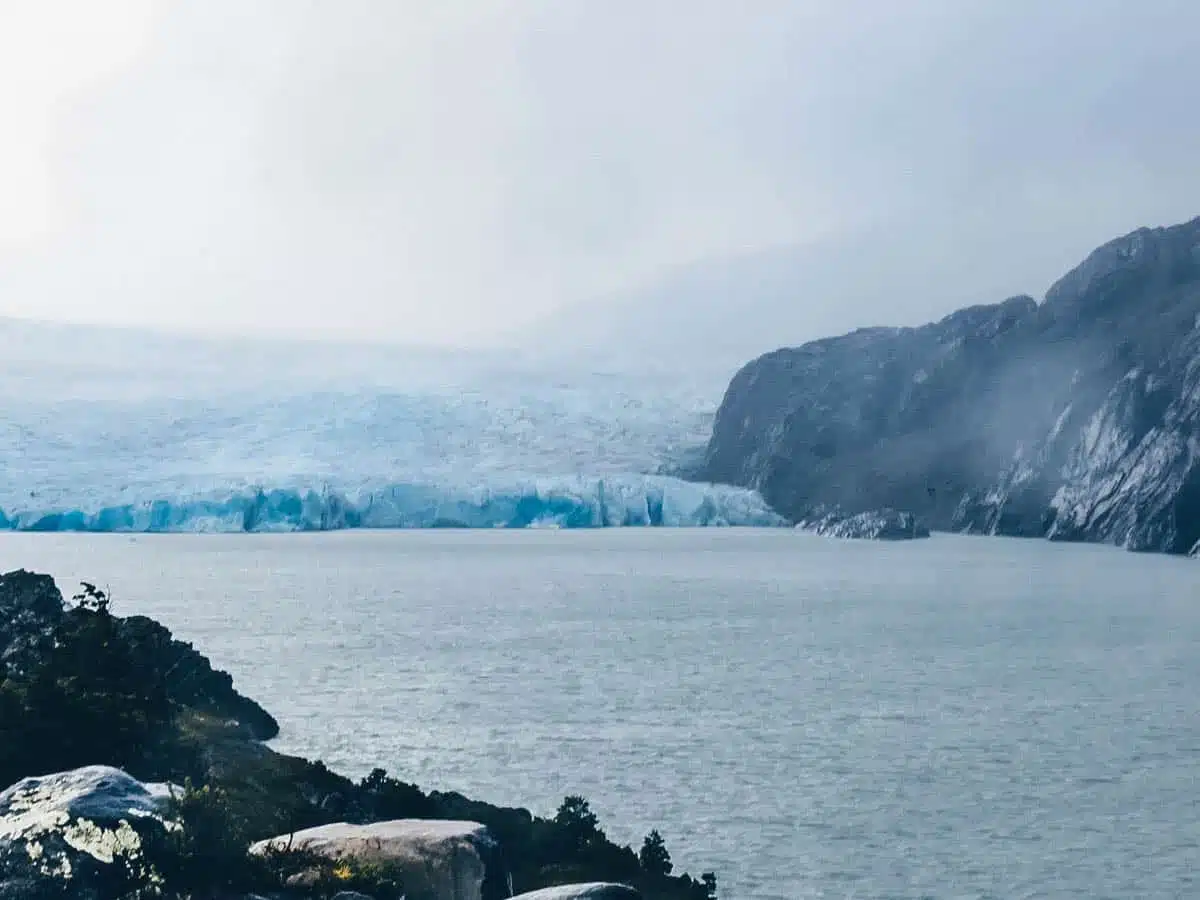
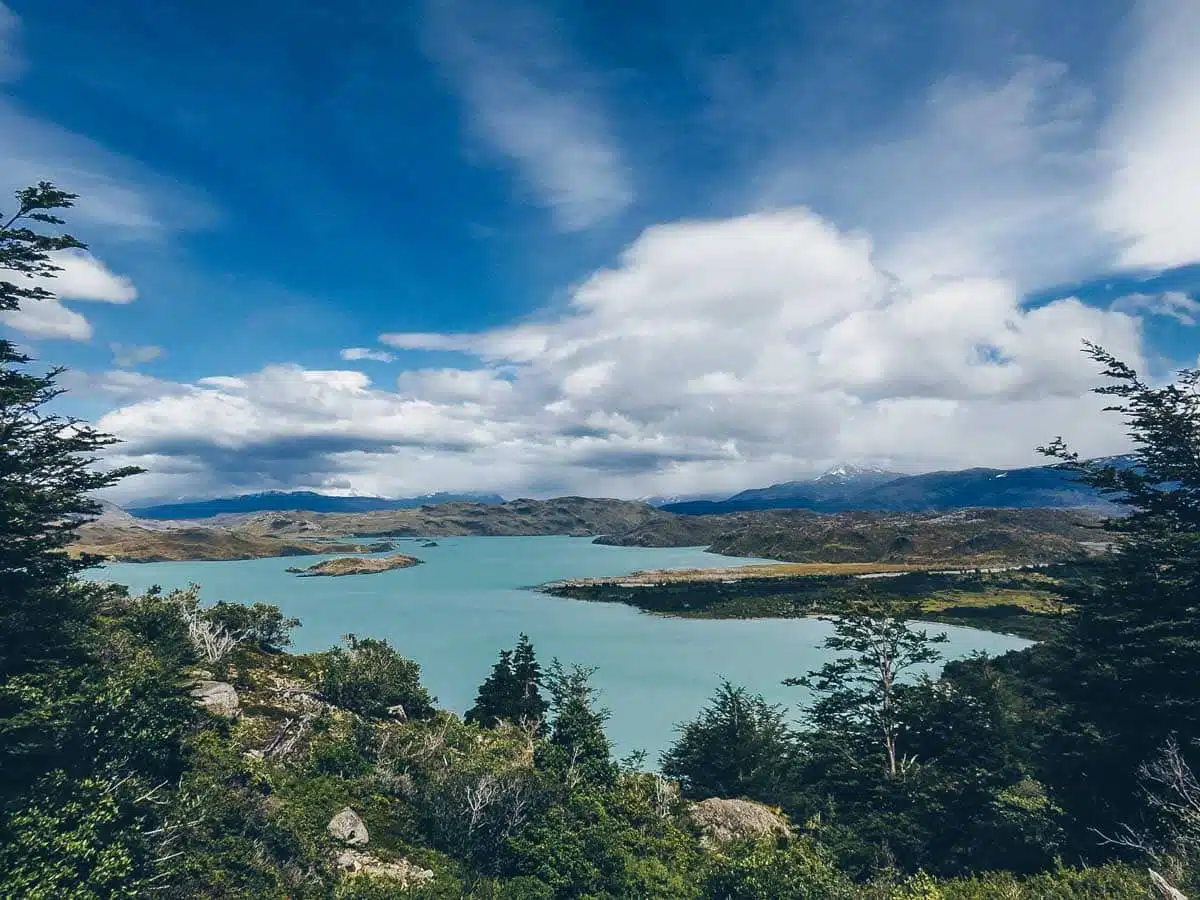
Lago Grey, an unexpected bright blue was behind me. Turning around, I could see a few small icebergs floating on the lake.
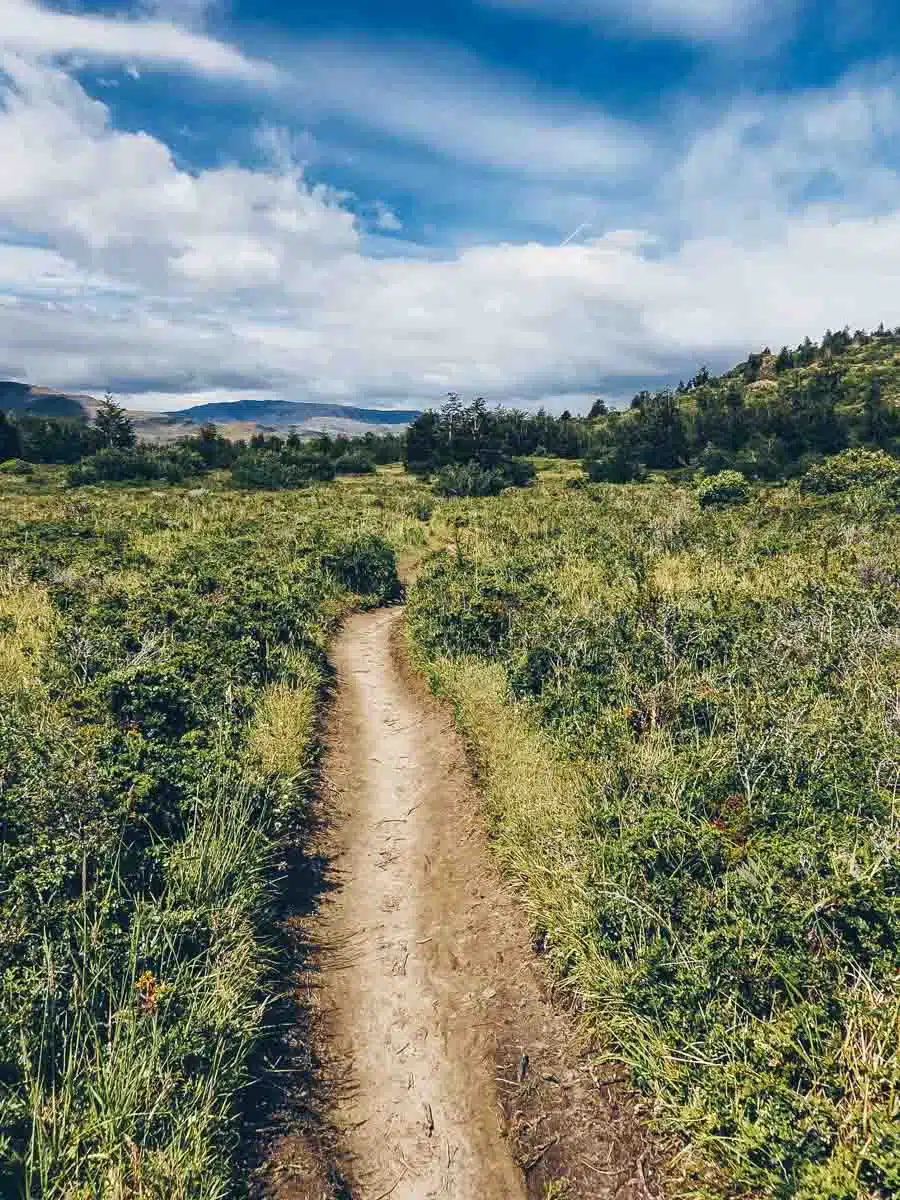
The rest of the day’s hike in the Torres del Paine towards Refugio Grey (so named for its close proximity to the lake and glacier of the same name) was uneventful.
There were frequent climbs and descents on the rocky path but on the whole it was not too challenging. I passed through meadows of foxgloves carpeting the rocky outcrops and spied a few tantalising glimpses of the glacier.
Unfortunately, that section of the park was severely damaged by a large fire in 2011. The fire burned for five days and covered an area of 40,000 acres – impossible to control due to the high winds and expanses of unpopulated land.
The terrain is recovering but the damage is still evident in the sections where the only flora is the burnt out trunks of thousands of trees.
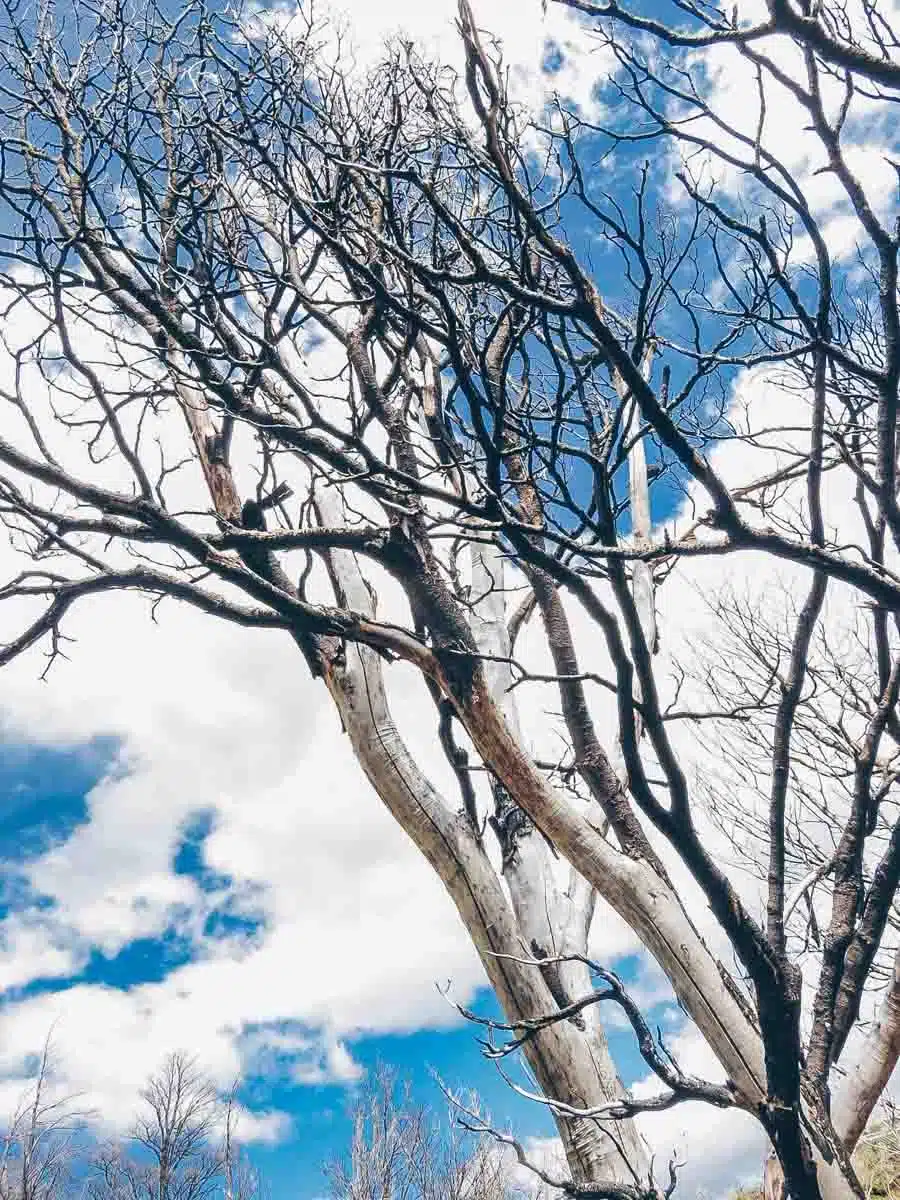
Fire damage in the park
At Erratic Rock they’d been at pains to stress that there were no open fires allowed in the park outside of special areas in the campsites. It had become clear why.
Seemingly in no time at all, I’d arrived at Refugio Grey where I flopped onto my bed for a short rest before heading to the communal area for dinner.
The pleasure (and sometimes pain) of travelling solo is that you’re forced to make conversations if you feel at all sociable.
I got chatting with a Chilean family who were doing the hike as a family reunion and who put up with my painfully slow Spanish with good humour. They talked about how, as Chilean people, they felt pride in the park and the care that was being taken to preserve it for future generations.
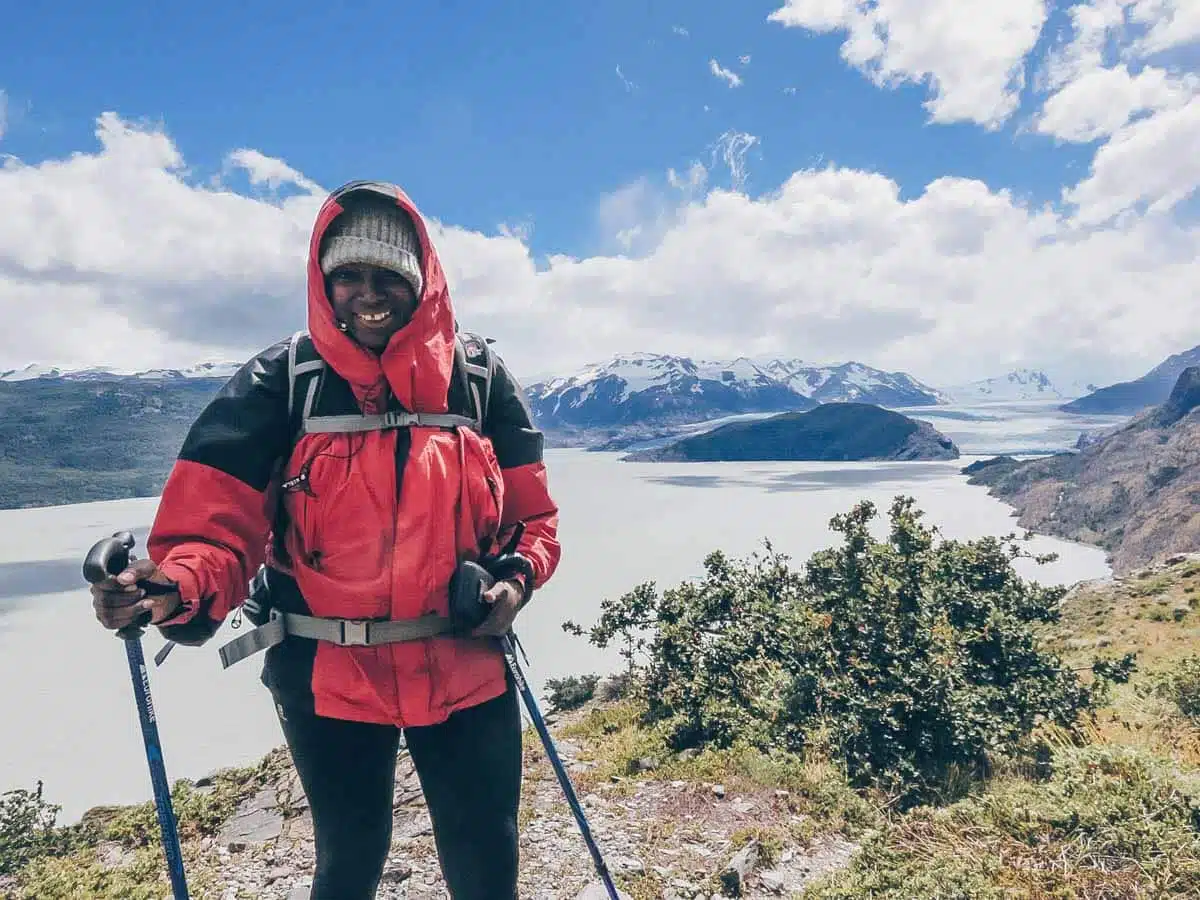
W Trek Patagonia Day 2: Refugio Grey to Refugio Paine Grande
The next day of my W trail in Patagonia was also supposed to be relatively easy.
I was going to hike 1 ½ hours to a viewpoint over Glacier Grey then return to the refugio along the same path and then take the path going back to Paine Grande.
It should have been simple but the morning dawned with heavy rains and winds so strong that I was continually being blown off my feet.
In retrospect, I must have looked so funny. I’d be walking in one direction and then be blown two paces in the other. At the time, I’d describe my feelings as a combination of pissed off and frustrated.
As the weather was supposed to get worse that afternoon, I was faced with a difficult decision.
Should I hike to the viewpoint (where the weather conditions made it unlikely that there was going to be much of a view to be had) and then risk not being able to make it to Paine Grande that day due to the bad weather?
The other option was to walk to the nearer viewpoint, 15 minutes away and then go onwards to Paine Grande from there. I decided on the latter.
The hike to the nearby viewpoint was disappointing enough to make me glad that I hadn’t spent another three hours on a round trip to see much of the same.
I’d been warned about the unpredictable weather being the biggest challenge for Torres del Paine hiking trips, and here it was, true to form.
Soon after, I set off for Paine Grande. It all looked so different from the previous day when the sun had been shining.
Even with my heavy pack on, there were a few instances where the wind managed to blow me off course. I put my music on and trudged along.
About halfway through the hike, the wind died down and the rain stopped. Before I knew it, I could see the lodge looming on the horizon and another day’s hike was done.
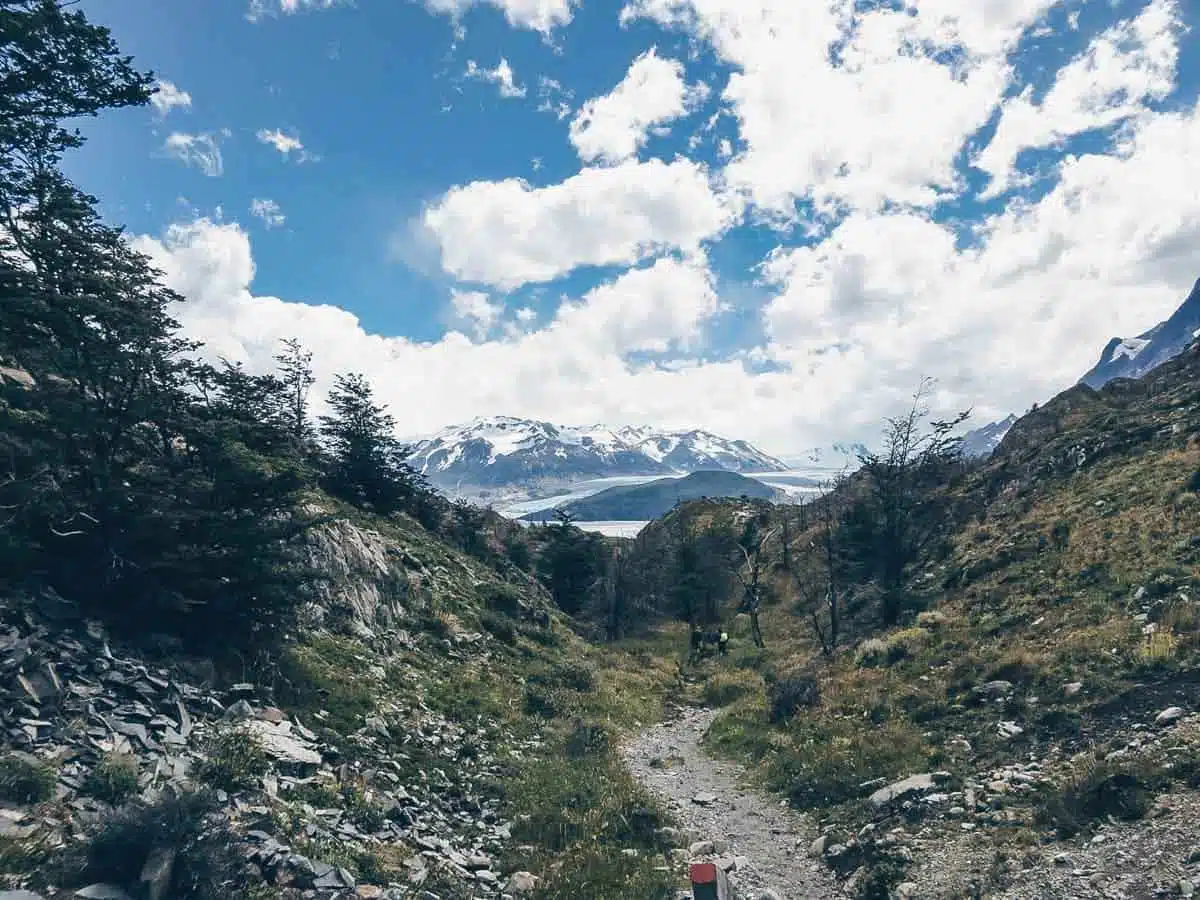
W Trek Patagonia Day 3: Los Cuernos via the Frances Valley
I had always known that the third and fourth days of the W trek in the Torres del Paine were going to require a change of pace.
So far, I’d hiked about 12km / 7.5 miles each day. Day three of the W Trail was 28km / 17.5 miles with a steep uphill climb into the Frances Valley.
The first section of the path between Paine Grande and Campamento Italiano (a free campsite at the base of the Frances Valley) was wonderful. The path was relatively flat and there were plenty of glacial springs where I refilled my water bottle.
While the fire had affected this part of the park as well, its effect was much less pronounced.
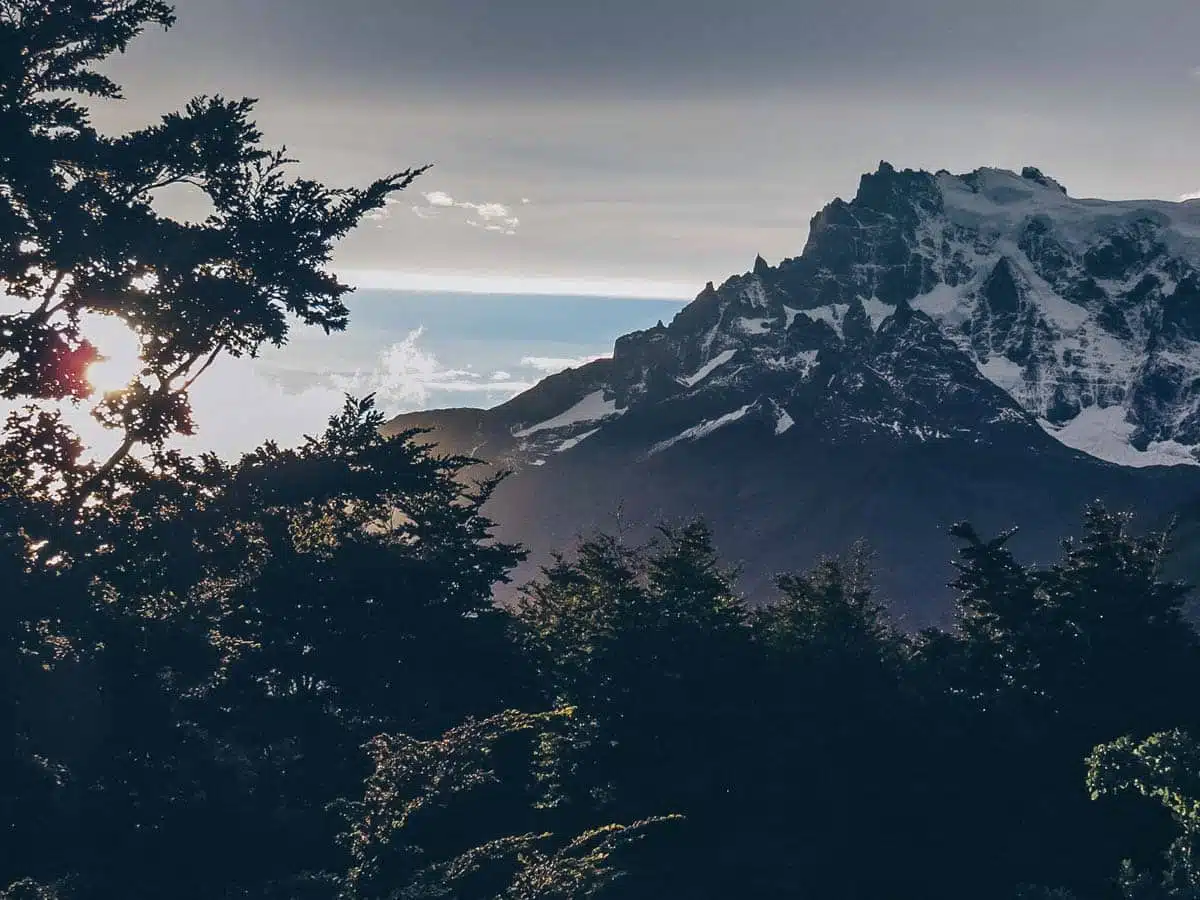
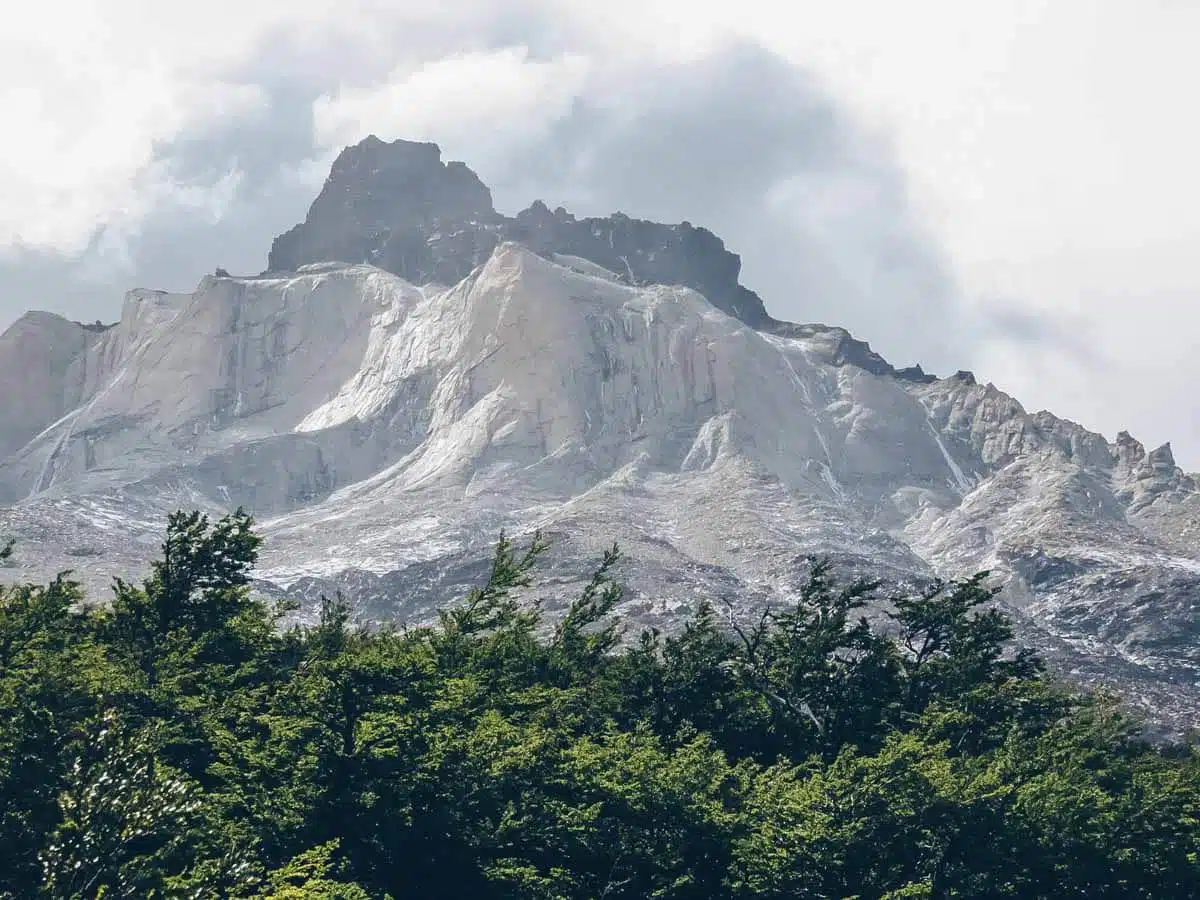
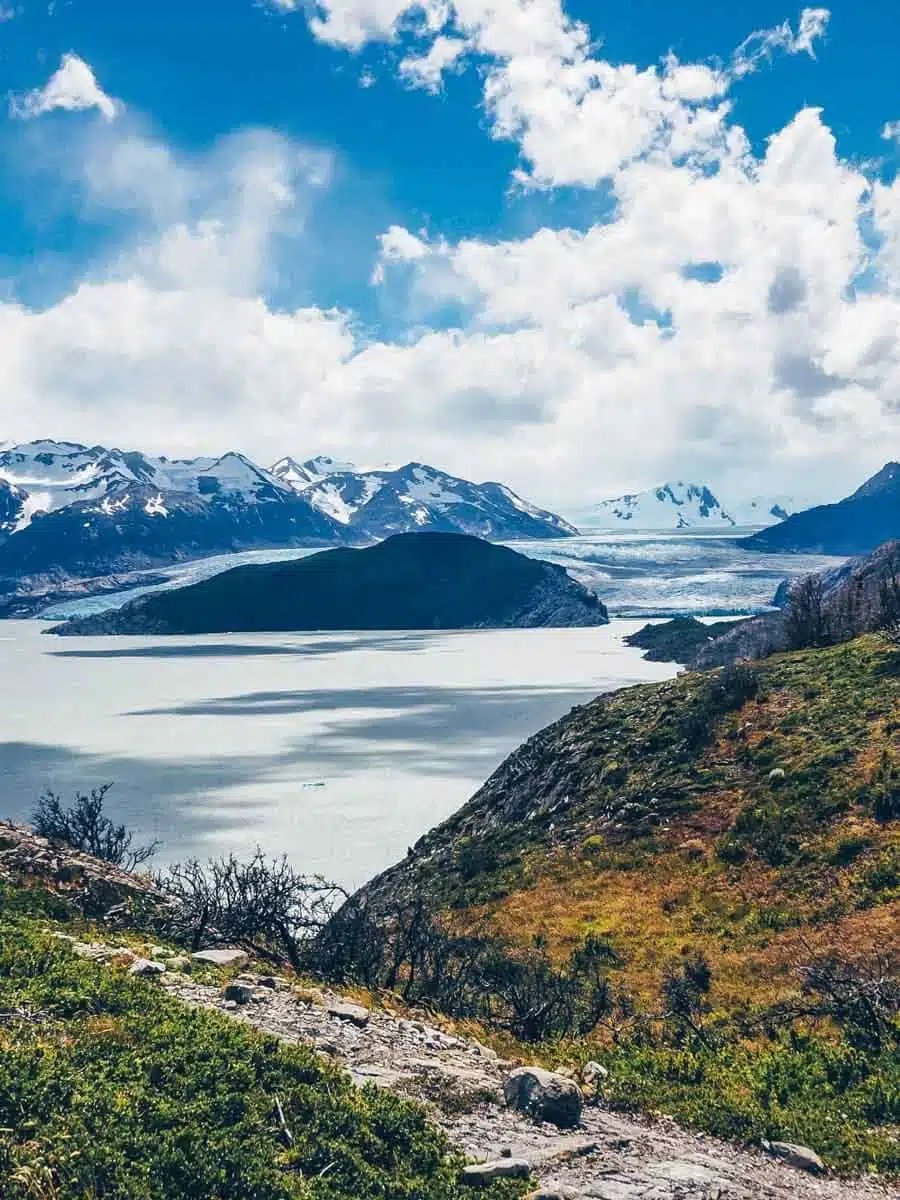
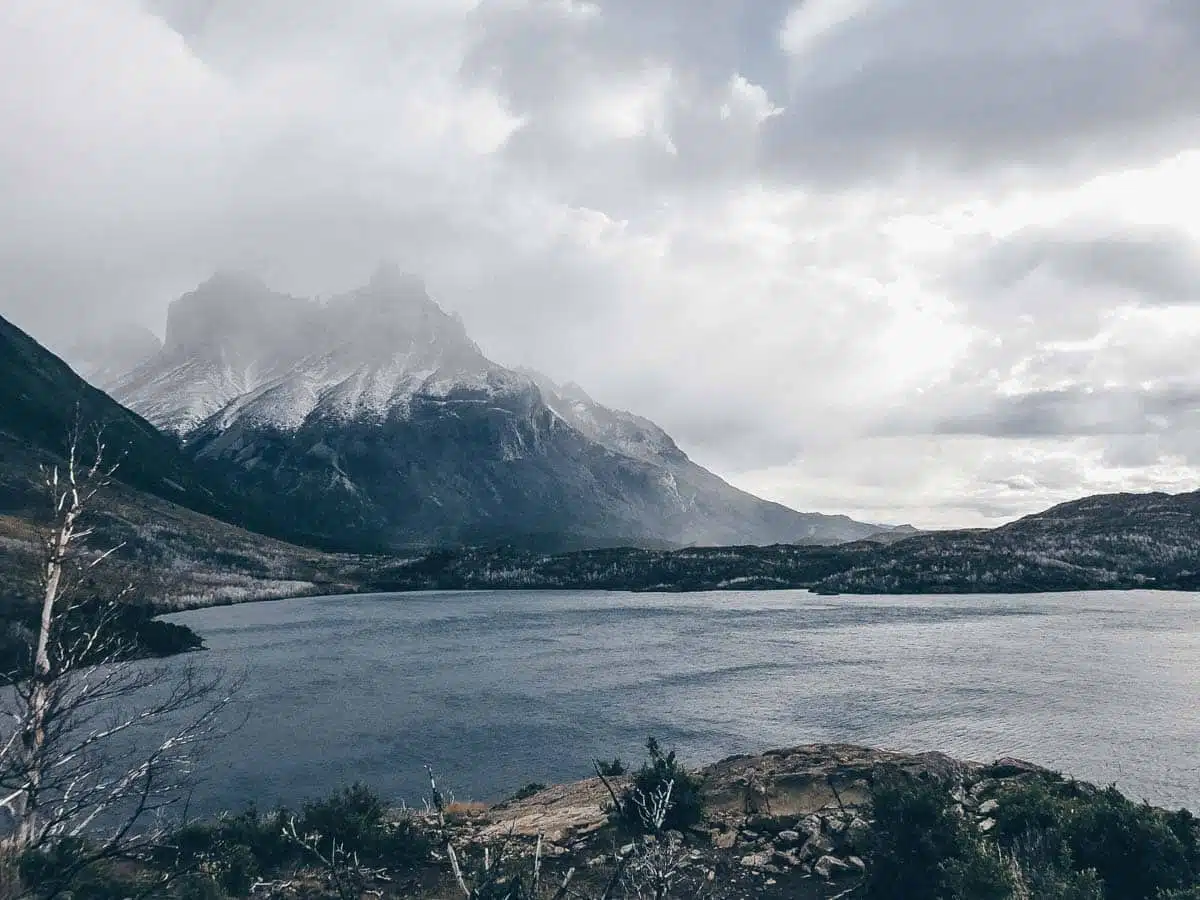
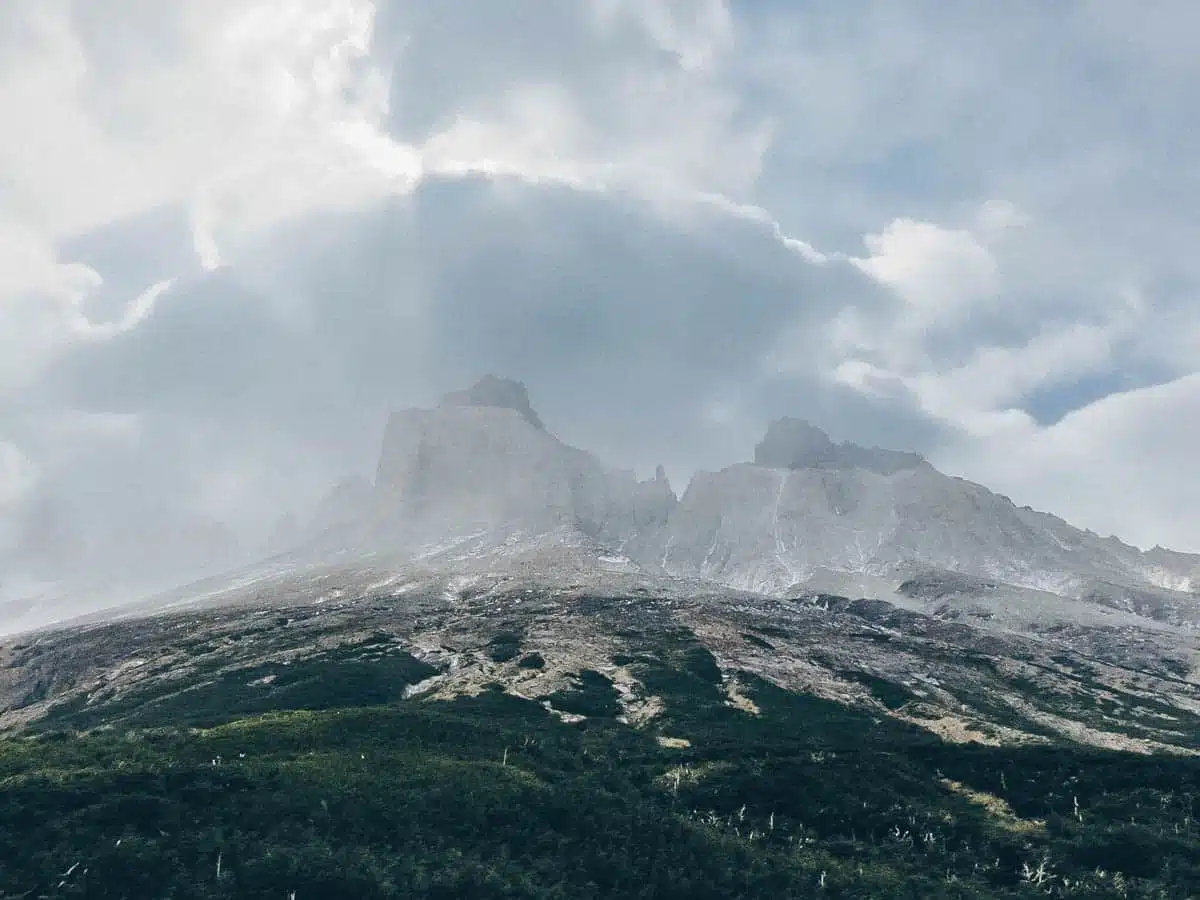
I skirted another large lake and, after an hour or so, got my first proper look at the Cuernos mountains – dark and imposing – rising 2500m into the sky.
Great views
When I arrived at Campamento Italiano, I dumped my large pack at the ranger’s station and then started on an uphill part of the trek towards the first lookout “Mirador Frances”.
This ascent and subsequent descent is the central line in the W after which the trail was named (have a look at the map if you’re not sure what I mean).
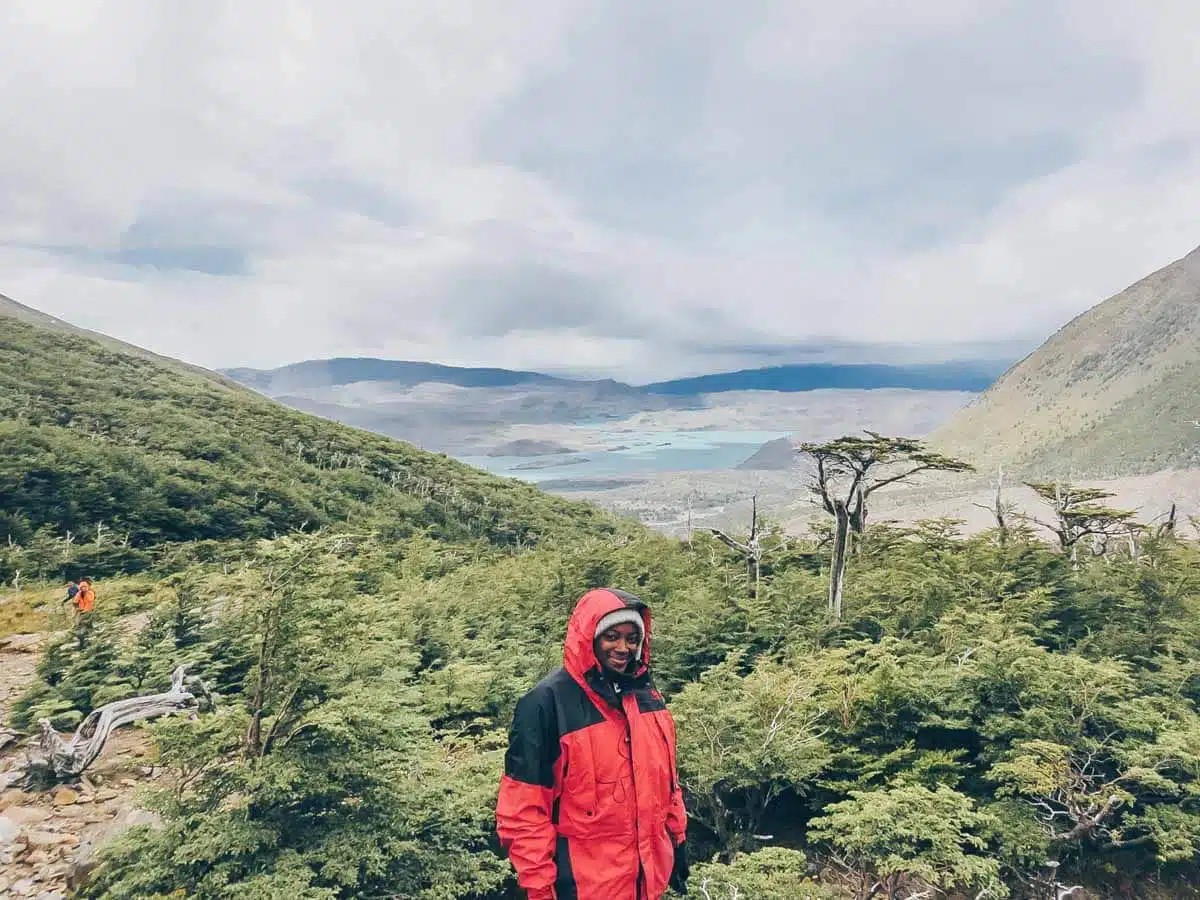
Climbing to the top of the Frances Valley gives you stunning views both of the valley and the surrounding mountain ranges.
Views over the Frances Valley
It was steep at times and of course, fate would have it that the day had turned hot and clear.
Suncream oozed off my face as fast as I could put it on. After an hour scrambling uphill, aided by my poles and some strategically placed ropes, I made it to the lookout.
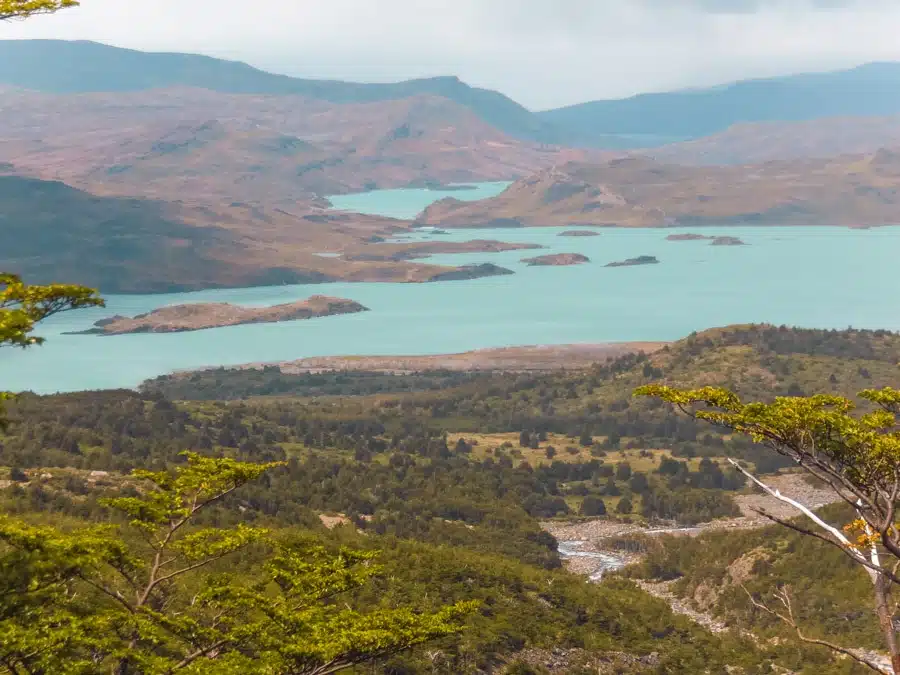
The view was worth the effort: from the height you could see the full scale of Lago Nordenskjöld, framed by the valley through which I’d just climbed.
Cerro Paine, the tallest mountain in the park at 2850m, loomed high. To the side, I could see the Torres in their glory.
Looking up at the mountains
I headed further into the next lookout, Britanico, but the clouds had come in fast and I wasn’t able to see much of the vista by the time I arrived.
Soon enough, it was time to return to Italiano.
I still had a long walk before arriving at Los Cuernos Refugio, my night’s accommodation. The walking wasn’t difficult: the first part was on a wide open flat with the beautiful views of Cuernos that had been the deciding factor in my trekking the W in this direction.
After passing Campamento Frances, the terrain changed, turning into a wooded habitat through which the path wound its way.
I was also becoming a bit paranoid about the pumas that roamed the Torres del Paine National Park.
It had been hours since I’d seen anyone else and as I became more weary, I was increasingly convinced that a puma was going to pounce and feast on my tired limbs before I made it to the refugio.
Luckily, by the time I was starting to question whether the refugio actually existed, I came across a small lakeside beach.

It was the perfect opportunity to take off my boots and dip my feet into the bracingly cold water. I rested for a few minutes before gathering my belongings for the last push.
Refreshed and cheered, I put on my pack and walked back onto the path from the beach. No sooner had I done so did I see the refugio peeking out from the trees.
Los Cuernos Refugio is no five-star lodge, but it was a welcome vision on the horizon.
By now, I’d come to recognise and chat to the others doing the Torres del Paine W trail in the same direction. My fellow Torres del Paine hikers were a mixed bunch, ranging from 20 to 75 and all with their own stories to tell as to why they were doing the trail.
We swapped the day’s battle stories over dinner and drinks before heading down to the lake’s shore in time to see the sunset.
In the (Southern Hemisphere) summer, sunset in the Torres del Paine isn’t until 10.30pm and generally marked the time to turn in and get ready for the next day.
W Trek Patagonia Day 4: Los Cuernos to El Chileno and the Torres
Soon enough, it was time to say goodbye to Los Cuernos Refugio and embark on my last full day of my Torres del Paine hiking adventure.
I needed to hike to Refugio Chileno and then on to the Torres del Paine themselves.
It was a steep climb out of Los Cuernos and already very hot despite it being before 9am.
The going was quick after the initial uphill burst, at least for a few hours before the path started to climb towards Chileno.
It was a slow two hours of hiking up steep inclines that were rarely punctuated with any flat sections. I stopped frequently: for water, to reapply sunscreen, to have a snack – for any reason that would afford a short break from the uphill climb.
Finally, I spied the refugio. It was at the bottom of the valley at which I stood at the top. Yet somehow, between the two points, there were still more uphill sections to be tackled.
Unsurprisingly, it was with a great sense of relief that I dropped my pack when I finally arrived at the refugio. The day’s hike was not yet over.
Everything I’d read about doing the W circuit in the Torres del Paine National Park recommended going straight up to the Torres del Paine in the afternoon if it was clear.
This is because the weather is so changeable that there is no guarantee that the visibility will be any good the next morning – your only other opportunity to see the Torres before you have to return to Puerto Natales.
Once again, I started out, this time unburdened by my heavy backpack. It’s an hour’s walk (uphill again) from Refugio Chileno to the free campsite Campamento Torres.
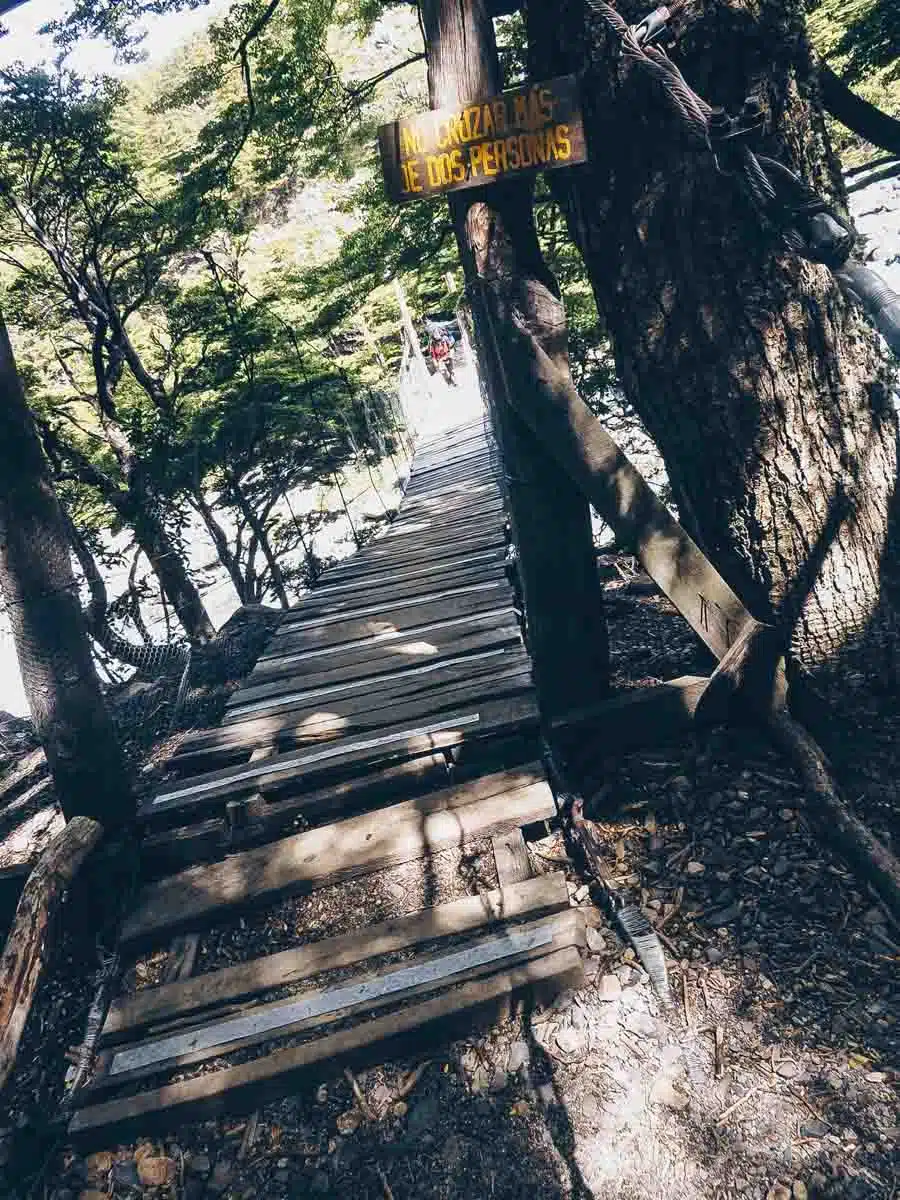
The path was mostly through forest, with a few rickety bridges crossing fast-flowing streams coming from the mountains.
At Campamento Torres I consulted the map and was relieved to see it was only 45 minutes to the viewpoint from which the Torres could be seen at their best.
What a 45 minutes. The path was so steep that it was almost vertical. It was hot, rocky and strenuous work.
On the way up I bumped into an Australian guy who had given me directions to my hostel in Puerto Natales. When I’d asked him how difficult the last section was, he’d pulled a face, avoided the question and said how beautiful it was when you reached the top. Now I understood why.
Towards the end of the path, I emerged from the forest above the treeline. Instead of being surrounded by the lush canopy that had been the main feature of the last hour’s trek, I was instead faced with a bouldered terrain that looked impossible to surmount.
It was not impossible but it was difficult work making my way from boulder to boulder. The poles were useless as there was nothing for them to grip onto – before long I put them away and decided to tackle it with my hands and feet.
More than once I considered turning and heading back. After all, no one would know that I hadn’t made it to the top (apart from you guys when I had no photos in this piece lol).
Still, I persisted.
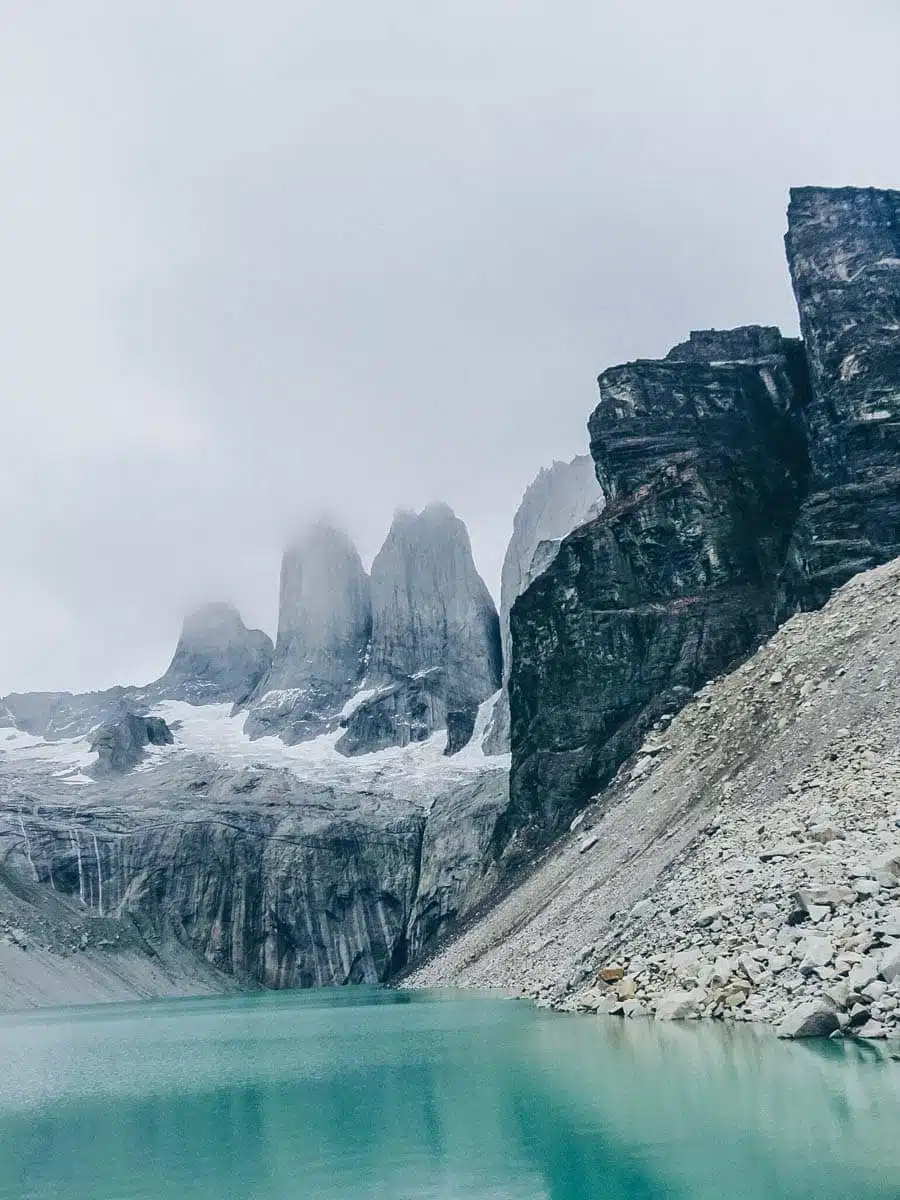
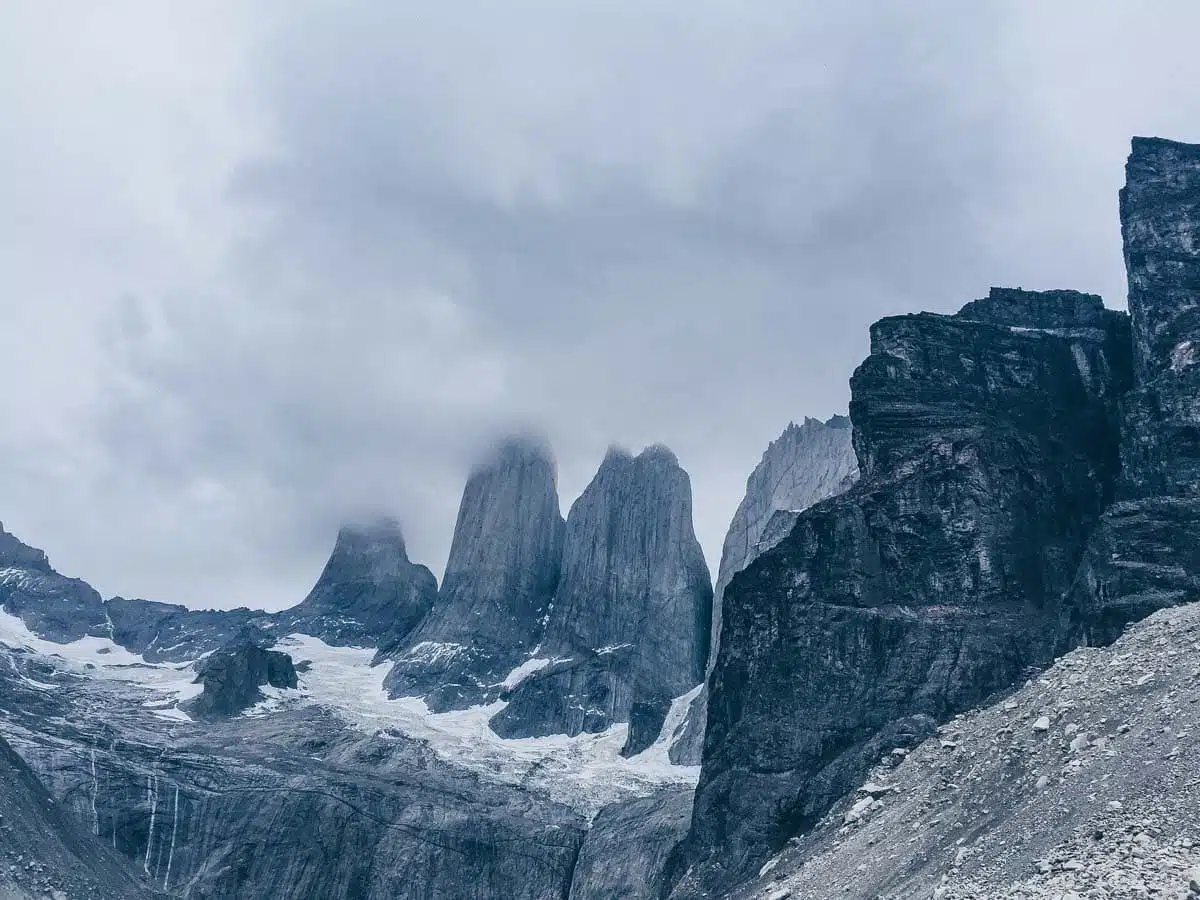
When I came to the top, I was glad that I had. There they were, the Torres del Paine, up close. Jagged peaks rising from a green lake to complete the picture.
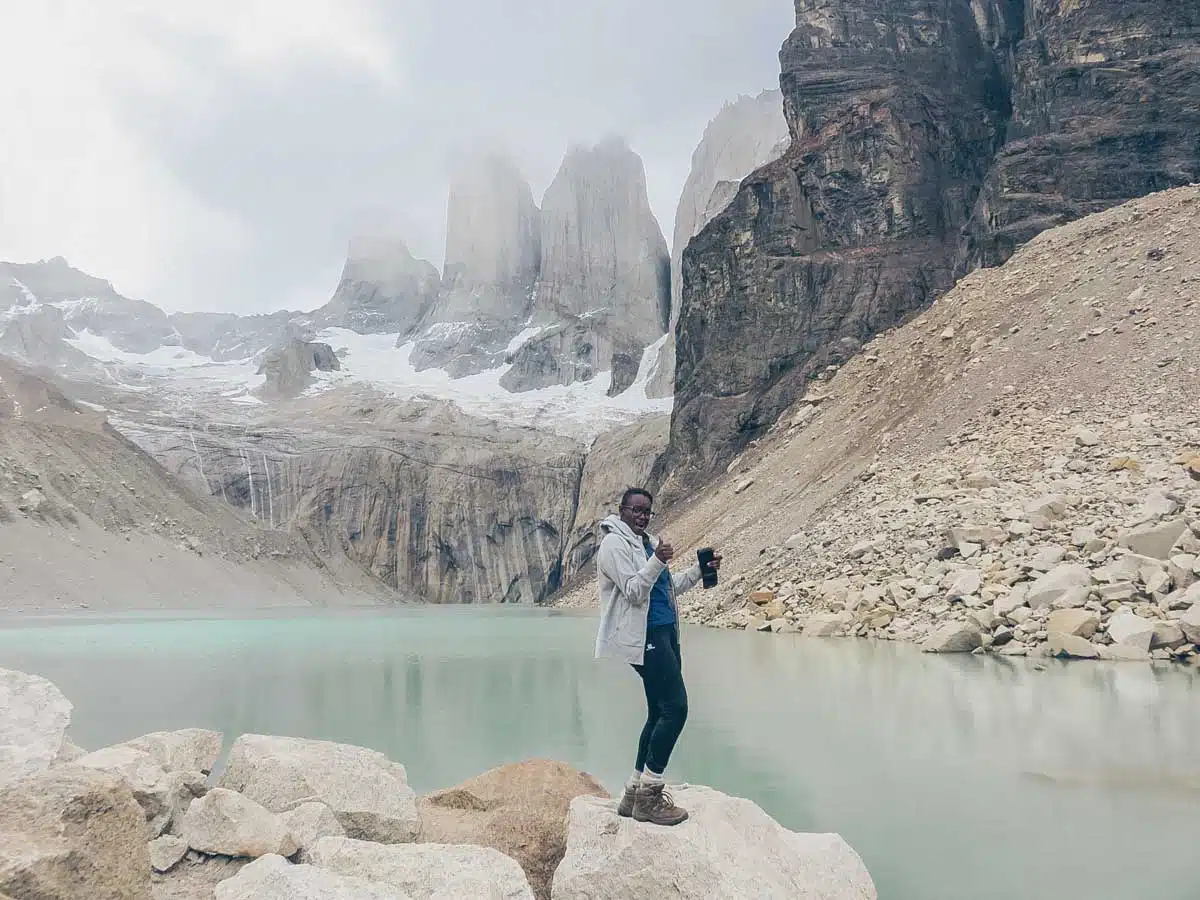
I sat, rested and soaked it all in for a few hours – the weather changed so quickly and it started to get really grey – before packing up my bag and going back down. It had started to rain and continued to do so for the rest of the evening. I’d made it just on time.
By the time I got back to the campsite, dinner had started but the others had saved a space for me to sit with them.
For five minutes I shovelled food into my mouth, with barely the energy to participate in the conversation going on around me. And then it hit me, I’d done it – we had all done it – we’d completed the W Trek in the Torres del Paine National Park.
The next morning was cloudy and rainy – making me thankful that I’d gone up to the Torres the day before. There would have been no glorious sunrise to see, just a grey mist.
In any case, I was mildly hungover from the wine the night before and the thought of that strenuous hike made me snuggle further into my sleeping bag and feel a bit queasy.
I packed my bag and geared up. There was nothing left to do but walk the 5km down with the others to the Hotel Las Torres.
I’d completed the W Trail in the Torres del Paine, now it was time to start my journey back to Puerto Natales, and, with that, a clean shower.
The Condensed Version: W Trek in 3 Days
If you’re very strapped for time, you can still experience most of what the W has to offer. However, you’ll be hiking longer distances each day and stopping for less time at the landmarks. In this itinerary, you’ll cut out Grey Glacier and instead head directly to Mirador Britanico and Mirador Torres.
If you want to modify this route, I would still strongly recommend starting at Torre Central and Chileno. It’s a lot easier to hike Mirador Britanico in the morning, and the only way you can do this is in the clockwise direction.
Day 1 of 3 – Torre Central to Mirador Torres to Chileno
You’ll start this day by arriving at the Puerto Natales bus station at 6:40 AM. Take the 7:00 AM bus from Puerto Natales to the Torres del Paine entrance, grab your stuff off the bus, pay for your ticket, then catch a shuttle to Torre Central. From Torre Central, you’ll hike up ~4 hours to the Mirador Torres (if the weather is nice).
On the way to Mirador Torres, drop your bags off at Chileno, as you’ll be back later to camp here or stay in the refugio.
After Chileno, it should take ~2 more hours to get up to the mirador. The terrain here is fairly flat until the last 2 kilometers, where the trail becomes steep and VERY rocky. Hang in there, you’re almost to the top!
Once you get to the mirador, you’ll be treated with beautiful views of the Torres del Paine peaks as well as the alpine lake below. Hang out here for a while, then head back to Chileno, where you’ll spend the first night.
Overnight in Chileno.
Day 2 of 3 – Chileno to Cuernos/Frances/Italiano
On this day, you’ll hike from Chileno to Cuernos, Frances, or Italiano. You can choose which campsite/refugio you’d like to stay in (if you need help deciding, read this). The hike isn’t hard, as it’ll be mostly downhill, but it is rather long, so keep that in mind. It’s basically the reverse of Day 4 of the 5-day W Trek variation, which goes something like this:
Cross the bridge towards Torre Central, then hike 3-4 kilometers until you see a right turn towards Los Cuernos (ask a range or guide nearby if you have trouble finding it). Turn right at the fork and head towards Los Cuernos.
Hike over mostly flat terrain past Lago Nordenskjold and Los Cuernos.
Eventually, you’ll arrive at Los Cuernos. Keep going on the trail for Frances and Italiano.
Overnight in Cuernos/Frances/Italiano.
Day 3 of 3 – Mirador Britanico to Paine Grande to Puerto Natales
Again, this is the opposite of the itinerary in day 5 of the 5-day version of the W. However, if you want a summary, here it is:
Wake up early (~6:00 AM) and, if the weather is fairly clear, hike up to Mirador Britanico in the morning. If necessary, bring your bags and drop them off at Italiano on the way up.
Head back to Italiano, grab your bags, and head to Paine Grande.
Once at Paine Grande, take the 2:35 PM, 5:00 PM, or 6:35 PM catamaran (schedule here) back to Pudeto, then take your bus back to Puerto Natales. (Be sure to check the times that your bus company runs before buying your return bus ticket. Usually, you can buy tickets directly from the buses at Pudeto as well.)
How To Get To The Torres Del Paine
To get to Torres del Paine, travellers have two main options.
The first is to fly to the Chilean airport of Punta Arenas, connect overland to the nearest town, Puerto Natales and take the morning or afternoon bus to the park’s entrance.
The other is to fly to El Calafate in Argentina, take a bus (crossing the border from Argentina to Chile) to Puerto Natales and then connect with another bus to the park.
Torres del Paine W Trek Map
Accommodation in the Torres Del Paine
Trekkers can choose to hike in the Torres del Paine park with their camping gear and food and stay in the free and paid campsites along the camp.
Another option is to stay in the refugios (mountain refuges) and pay for meals to be provided. Or you can stay in refugios but bring your own meals.
The latter is the easiest option, particularly if you are hiking on your own but can prove quite pricey for very basic lodging and food.
I’ve gone into more detail about the refugios and campsites relevant for the W trek below.
It’s important to note that since 2016 you have to book all of your accommodation in advance, whether you are going to stay in refugios, free campsites or paid campsites.
Torres del Paine Refugios Booking
There are several refugios along the W trail in the Torres del Paine National Park. Each one is managed by one of two companies: Vertice Patagonia or Fantastico Sur.
I’ve listed the refugios and which company they’re managed by below.
- Los Cuernos (Fantastico Sur)
- El Chileno (Fantastico Sur)
- Torre Norte (Fantastico Sur)
- Torre Central (Fantastico Sur)
- Refugio Paine Grande (Vertice Patagonia)
- Refugio Grey (Vertice Patagonia)
Bookings for the Torres del Paine refugios can be made via Vertice Patagonia and Fantastico Sur websites.
Camping Torres del Paine
There are two kinds of campsites in the Torres del Paine National Park: free ones and paid ones.
Free Campsites
Before you get toooooo excited about the free ones I will say that they are very basic. But they’re also free so that’s pretty awesome. Still have to book though!
Here’s the list of free campsites in the national park:
- Campamento Torres (CONAF)
- Campamento Italiano (CONAF)
- Campamento Britanico
- Campamento Japones
You can wave goodbye to any thoughts of Britanico and Japones unless you’re a licenced climber – you can’t stay there unless you are.
You need to book the campsites in advance. CONAF’s website is www.conaf.cl
Paid Campsites (and Info to Book Campsites for Torres del Paine)
Paid campsites are exactly what they say on the tin. The list of paid campsites in the park is as follows:
- Campamento Paine Grande (Vertice Patagonia)
- Campamento Los Cuernos (Fantastico Sur)
- Campamento Chileno (Fantastico Sur)
- Campamento Grey (Vertice Patagonia)
And there we are: the Torres del Paine W Trek. I hope that you have a wonderful time. Any questions, drop me a comment in the box below.
Hiking the W Trek in Torres del Paine: Read Next
- Torres del Paine Packing List
- Camping in the Torres Del Paine, A Practical Guide
- Unmissable Things to do in Chile
Travelling in South America? Read my full South America Travel Guides now.
A fan of hiking? You might also enjoy this piece on Road Tripping in the Atacama Desert. And if that isn’t enough, check out these other hikes in South America that you can conquer.
Alternatively, check out this cool Patagonia itinerary.
Love This? Save and Share on Pinterest

Discover the top things to do, insider tips and hidden gems in our Chile Travel Guides.
Read the guides →

Great post.
Thank you, that’s appreciated
Tremendous post with detailed information…much appreciated Congrats on completing such a legendary solo hike. Stay Hard!
Thank you Dave! It’s EPIC – you’re going to have an amazing time 🙂